Into the Dead: Our Darkest Days: Game Guide
This guide is based on v1.0 Early Access
Into the Dead: Our Darkest Days is the latest survival horror experience on Steam, blending base-building, scavenging, and tense, nail-biting encounters with the undead.
The game just launched into Early Access, meaning more features and balance changes are coming — but core mechanics like character selection and traits are already vital to success.
If you’ve been playing through this one, we’ve put together some handy guides for everything you need to know and make it through to the other side. In this guide, we’ll be discussing vital survival tips to keep you alive in the opening hours!
Depending on which characters you’ve chosen to play as, survival will either be significantly easier or tougher, depending on how you choose to play. However, here are some tips to help you through those restless nights and prevent some nasty zombie bites in the process.
Combat & Zombies
When out scavenging, you’ll quickly notice that areas are crawling with the undead. Certain areas will include zombies in the foreground and background just hovering around, and they can be alerted by your actions. Unfortunately, they can also be “recruited” by zombies screaming out, bringing plenty of undead to your location.
For this reason, if you notice zombies in the foreground and background, do not sprint through the areas. These zombies will hear you and immediately rush to your location.

Before this happens, be sure to peek through doorways or approach zombies when they’re walking away from you. If you have any weapons at hand, now’s a great chance to get a melee strike in. Approach from behind and attack.
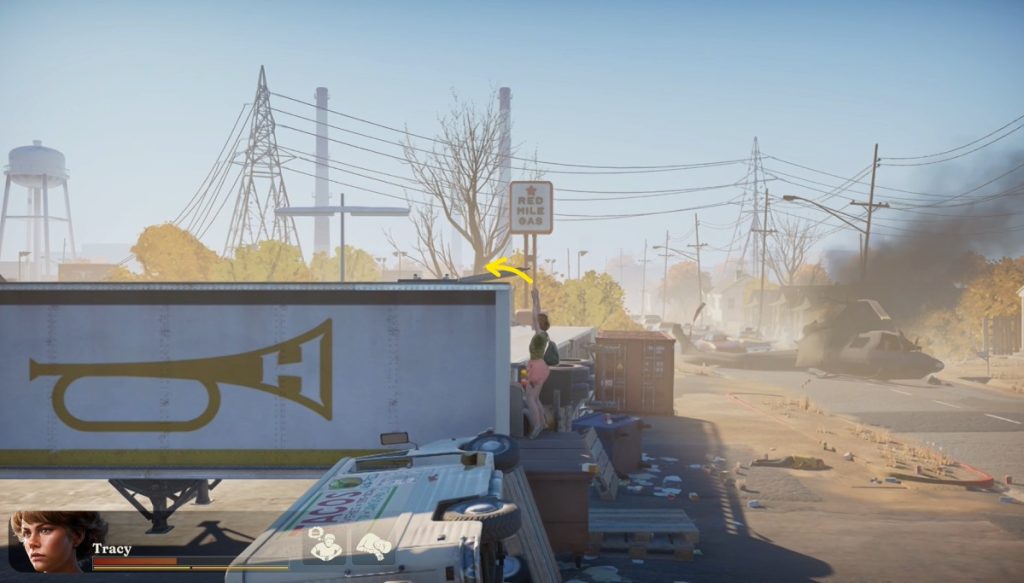
It’s also a good idea to get up high if you’re not controlling a combat specialist. (Approach a rooftop and hold Up to climb) to prevent any nearby zombies grabbing you.

Combat is risky pretty much all of your play-time, but especially early on when your survivors are weak and resources are scarce. If a scavenging run goes bad, or your health dips low, it’s better to retreat and try again than risk losing a character which will affect long-term morale.
Run Away!
If it all gets a bit much, be sure to use your trusty sprint to run away. If you’re cornered by several zombies and running isn’t an option, you can attempt to spam dodge and climb over nearby objects until you get a chance to sprint.
You aren’t Rick Grimes from Walking Dead or Joel from The Last of Us; the core gameplay loop involves grabbing supplies and scavenging, so take advantage of stealth, hiding spots and the noise of your weapon. Make it a habit to close doors so you break the line of sight of zombies too.
Upgrade Your Base Early
As you play through Into the Dead, you’ll quickly notice that your character is reliant on not just a standard HP bar, but also meters for Hunger, Sleep and Morale. Sleep can only be replenished by sleeping in beds at the Shelter.

As for Hunger, you can use raw food found out in the wild but there’s a chance you’ll get an Upset Stomach and be sick. Furthermore, Morale can only be gained by either drinking alcohol (for a temporary boost) or through spending time at the Communal Area in your base.

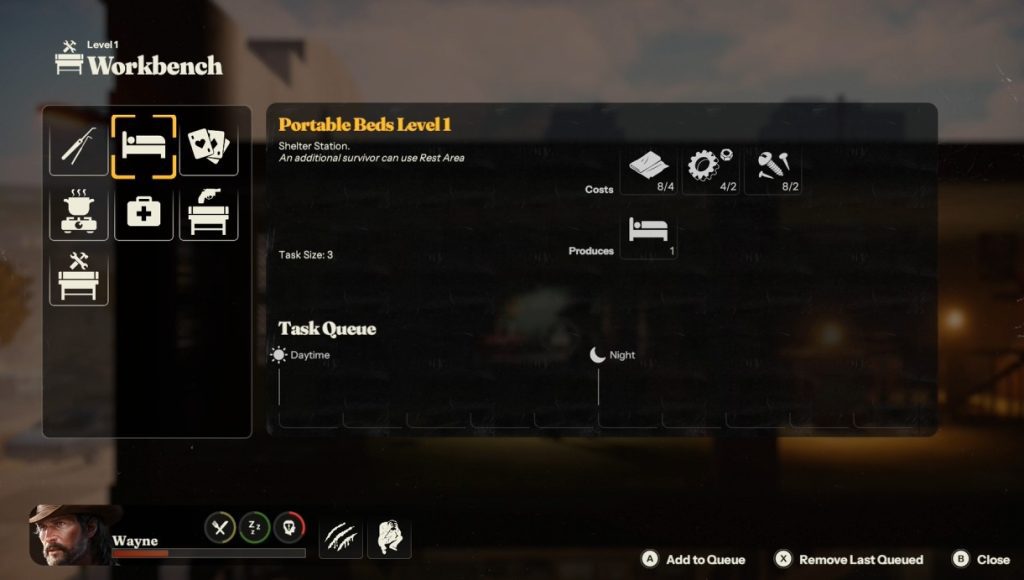
As upgrades carry across bases, don’t be afraid to loot resources and very early on make sure you have a:
|
Workbench Level 2 Gains access to the Dismantling Bench, which (when used) gives you more resources |
|
Communal Area Restores Morale and negative Mental states |
|
Medical Area Allows you to craft Healing Kits and Bandages |
|
Cooking Area Allows you to make basic meals which replenish your hunger more than raw food |
|
Weapons Bench Allows you to create makeshift weapons to take out scavenging |
Also be sure to keep your Barricades topped up as well, which uses up 2 pieces of wood. However, it also renders the builder unavailable for the day or night so choose wisely.
The above upgrades are absolutely essential to surviving, and once you get some upgrades under your belt and recruit some survivors, that’s when you should add another bed, but this is not a top priority early on.
Manage Your Group Wisely
Not every survivor should go out scavenging. If someone has strong crafting, cooking, or barricading traits, keep them back at base to maximize efficiency and reduce overall fatigue across the team.
Conversely, those better in a tight combat pinch or happen to have traits that warrant them going out and about, send those out on patrol instead.
Each day is split into a Day/Night cycle too and each action you take – whether at the workbenches, the bed and the communal area – will take up time. Plan your sessions wisely and keep an eye on your stats. Sometimes it’s better to sleep and restore rest/morale at the base than push forward and end up burnt out.
Move Shelters When your Barricades are Almost Depleted
This one is more a handy tip and a bit of a workaround to the game’s Barricade mechanic. The zombies will initially do 1 point of damage to your base but after a few days, this will exponentially increase until it’s untenable to stay where you are. When your barricade is almost destroyed, it’s actually a good idea to shift across to another base instead.

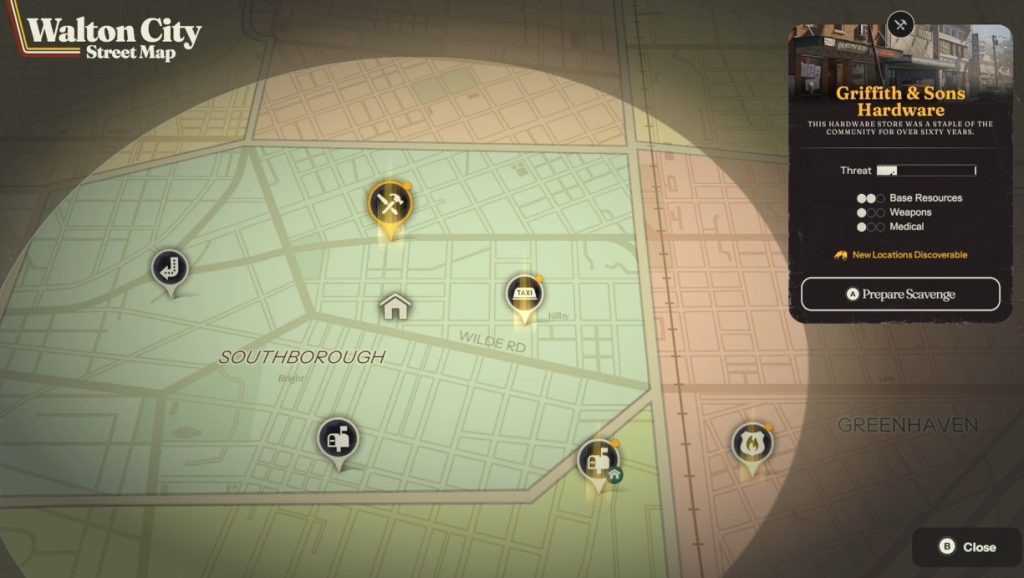
The goal here is very much to move your shelter across to different areas regularly, as you can only explore those areas within the bright spots of your map. This will also reset the damage zombies do to your base to 1 point of damage each time.
Scavenge Strategically
While choose an area to Scavenge, be mindful of what you actually need in your base when choosing where to scavenge and explore. If everybody is dying of hunger and you have no food, you need to choose an area with a high Food ranking on the areas.

Conversely, if you desperately need wood and materials to craft new bits of your base, hunting at a spot with a high Base Resources is your best bet.
The threat level will indicate the number of zombies in that area, while the Yellow “New Locations Discoverable” is invaluable for unlocking more of the map. Here, you can find Telescopes at the upper-regions of the area which help unlock more areas to discover.
If you don’t manage to explore everything in one go, or are nearly dead, don’t try and brute-force your way through. Your progress in that area is essentially “saved” so when you return, you won’t have to destroy the same number of zombies again.
Recruit Survivors When You Can
Survivors are a great asset to your team and when you can, you should absolutely look to recruit them to your team. Even the most useless members can be used to good effect to craft resources or help bolster out your forces back at base.
Exploration is key in that respect, so keep your wits about you! We have a full breakdown of all characters and survivors you can recruit HERE!

At the time of writing, Survivor slots are linked to specific areas of the game but due to the volatility of Early Access and the likelihood of these changing, we won’t list their locations here. Suffice to say though, always recruit when you can!
Stairs Are OP
In the current Early Access version, Stairs are incredibly useful for scouting in houses. If you crouch and remain in the middle of a stairwell, you can see both above and below, making it an effective scouting area.

You can also hide from the Undead here if you’ve been spotted and manage to break line of sight, and coupled with closing doors, it can work really well to make you nigh-on invisible.
Final Words
So there we have it! Our survival guide to hopefully help you out as you try to stave off the undead ad survive for as long as you possibly can in the face of the zombie apocalypse.
The game is still in Early Access so a lot could change between now and final release, but in its current state, Into the Dead: Our Darkest Days is an intriguing survival horror and certainly an enjoyable – but suitably tough – experience. Good luck out there fellow survivors!
Are you playing through Into the Dead: Our Darkest Days? What tips have you found to help you out? Let us know in the comments below!


