

Table of Contents[Hide][Show]
Shattered Veil continues the Black Ops 6 Zombies arc of the Dark Aether story. With the Sentinel Artifact now acquired, the crew heads to the manor that looms over the doomed Liberty Falls. With the promise that Maxis can be rescued from the Dark Aether, the team must brave the horrors of the mansion while the echoes of a lost Director fill the halls. Players who want to complete this map’s Easter Egg Quest will need to solve the mysteries of this history-filled building. This guide will show players how to complete the Shattered Veil Main Quest Easter Egg in Black Ops 6 Zombies.
How to Complete the Shattered Veil Main Quest Easter Egg in Black Ops 6 Zombies
Before starting your run at the Main Quest Easter Egg, it’s important that I lay out a few things you should make sure you equip in the pre-game lobby. You will want to make sure you have some good Augments equipped to your Perks and Field Upgrade to make the game and especially the final boss fight easier.
Juggernog is a Perk you are going to get every game of Shattered Veil, not just when you’re running the Easter Egg. The Probiotic Major Augment for Juggernog is one of the most important ones for you to get an extra 50 HP. Speed Cola is necessary because when you face off with the boss, you will be given a small window of opportunity to do damage to the boss so making sure you are able to reload quickly can save your run. Speed Cola’s Supercharged Major Augment is great here since it will charge your Field Upgrade faster. For the Minor Augment, I suggest Quick Swap to increase weapon change speed since you will be changing between the Wonder Weapon and your bullet weapon of choice.
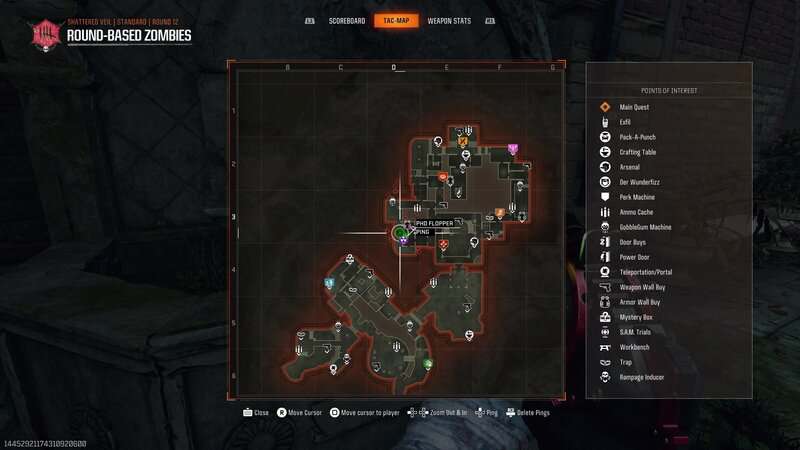
The boss fight of Shattered Veil can be difficult in its latter phases, mostly because of the creature’s quick movement speed and series of bite attacks. This, coupled with the Zombies in the battle arena and the hazards that slow your movement, can quickly get you and your team killed. So I suggest bringing in Stamin-Up to improve your sprint speed. The Dasher Major Augment will give you a longer Tactical Sprint Duration and the Hot Foot Minor Augment will give a speed boost for a short time after killing a Zombie with Equipment, which can quickly get you out of a jam. PhD Flopper with the Tribologist is also a must-have since it will increase your distance and speed when sliding, allowing you to get away from the boss even at its max speed.
Quick Revive is great for making sure you heal quickly from damage. Use the Dying Wish Major Augment since it will basically give you an extra down during the boss fight. Any Minor Augment is fine here but I suggest the Karmic Return Augment if you’re playing co-op since it heals you if you revive a teammate. The newly introduced Double Tap Root Beer Perk is also a great choice to double your rate of fire. While I am going to suggest weapons later on that negate this Augment, the Double Impact or Double Standard Major Augments are great choices if you decide to use a bullet weapon during the final boss fight. The former will deal more damage on double hits that target the same enemy while the latter will give all non-critcal hits double damage when using a bullet weapon. The Double Time Minor Augment will further increase your rate of fire, also making it a great choice.
When it comes to your Field Upgrade, Aether Shroud must be equipped for the Easter Egg so feel free to keep it on and use it to vanish and catch your breath during the fight. The Extra Charge Minor Augments are great here. I suggest the Burst Dash Major Augment to get through the horde if you find yourself in trouble or need to get close to the boss. If you’re playing with a team, the Group Shroud Major Augment is also great. Another good option is Frenzied Guard so that you can replenish your Armor Plates. You can change your Field Upgrade in the pause menu. The Retribution will trigger an explosion when your armor breaks and can be a great way to get Zombies away from you. Use the Repair Boos Mionr Augment to repair more armor per kill. If you’re playing in a team, consider the Phalanx Major Augment and Rally Minor Augment. The former will allow your teammates to repair their armor when getting kills during the Field Upgrade’s duration, while the latter will repair your team’s armor upon activation.
If you also want to use Gobblegums, here are a few suggestions. Cache Back is extremely important since, unlike other bosses in Black Ops 6, the boss fight doesn’t have a phase that gives you a free Max Ammo, so you will need to buy ammo to keep yourself from running out. Having a Cache Back in your back pocket can save a run if you run low on points and ammo. Arsenal Accelerator is great to keep your Field Upgrade charged and Shields Up will give you a fresh set of armor and make it strong for a short time to make it harder for the enemies to down you. Free Fire will give you unlimited ammo for a minute so this can be great to make sure you don’t fail to take down a phase of the boss because you need to reload. Idle Eyes is also great because it will cause all Zombies to just stand still for 30 seconds, giving you an opening to just focus on the boss. If you’re playing co-op, Phoenix Up and Near Death Experience are great for making sure your team stays alive.
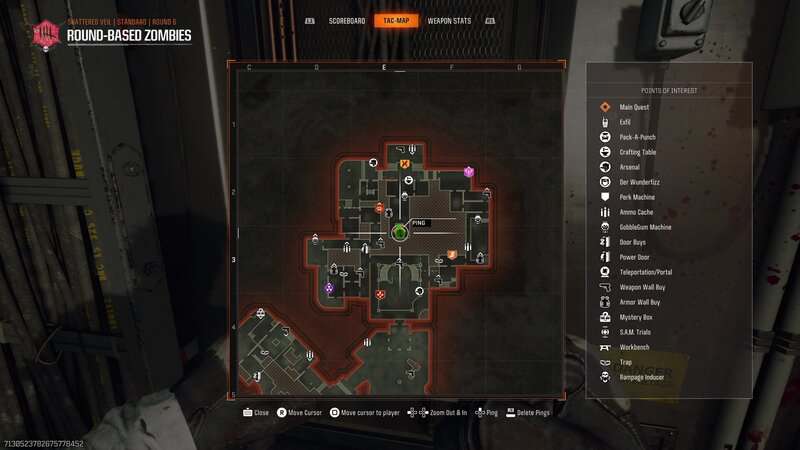
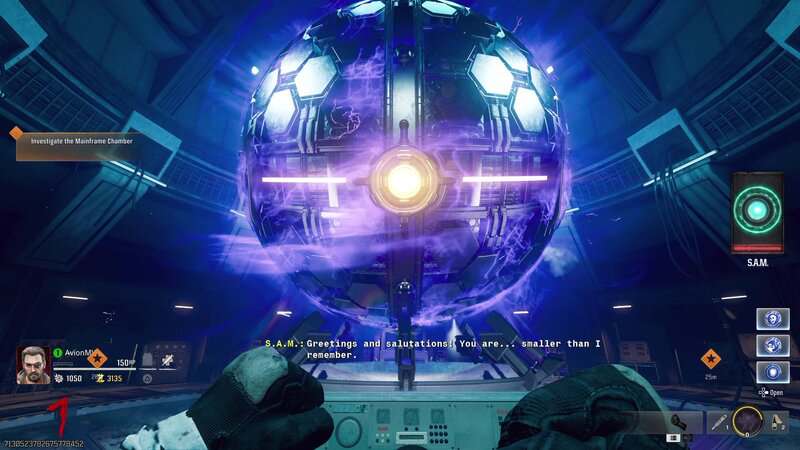
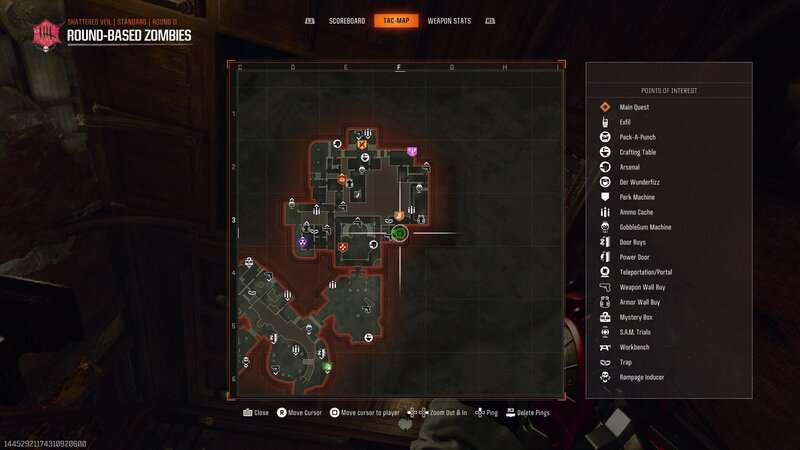
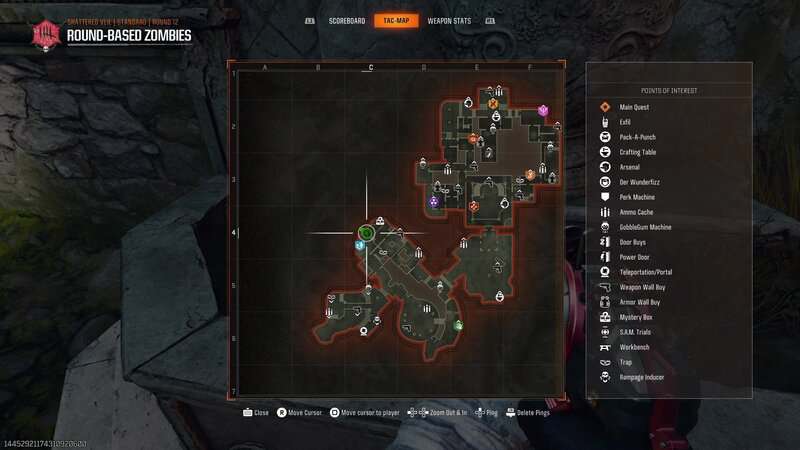
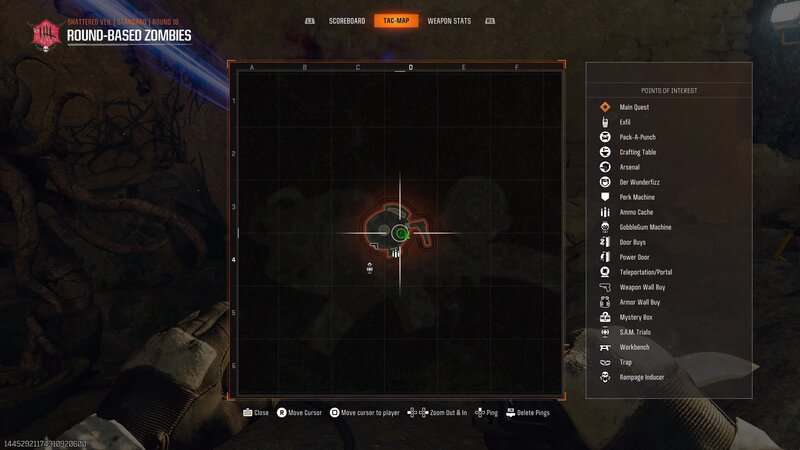
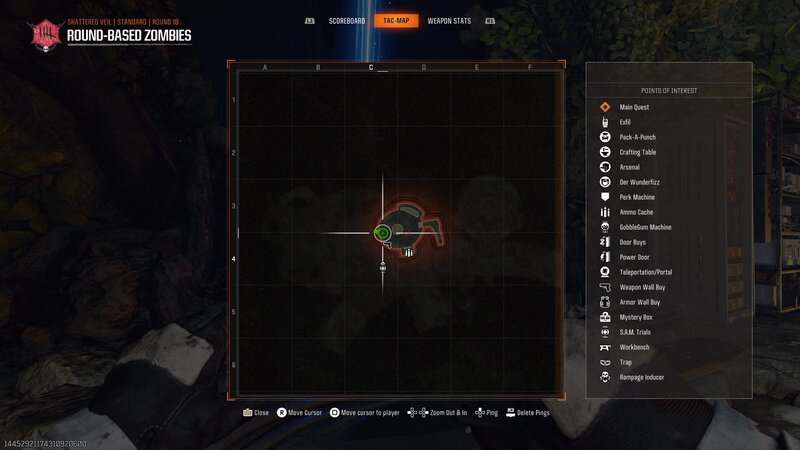
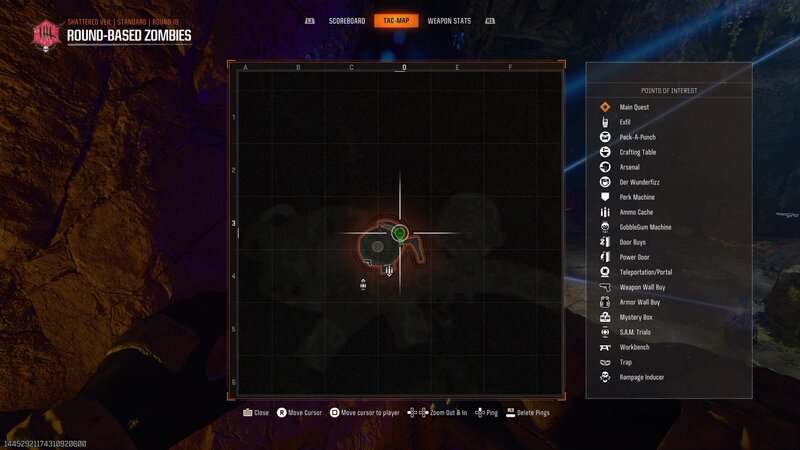
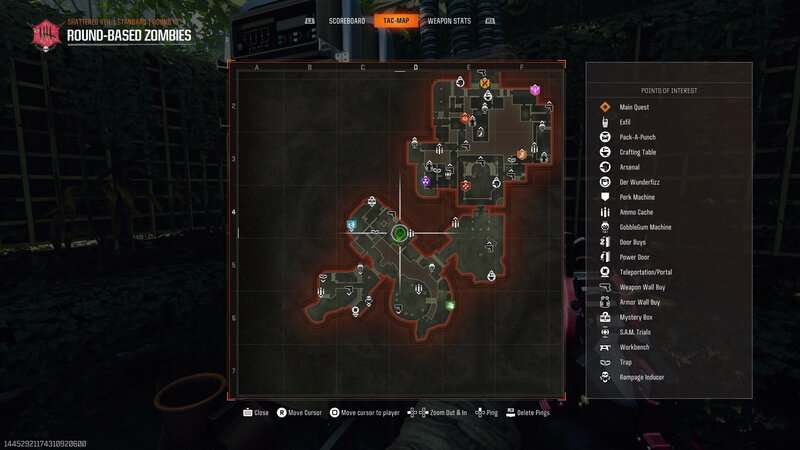
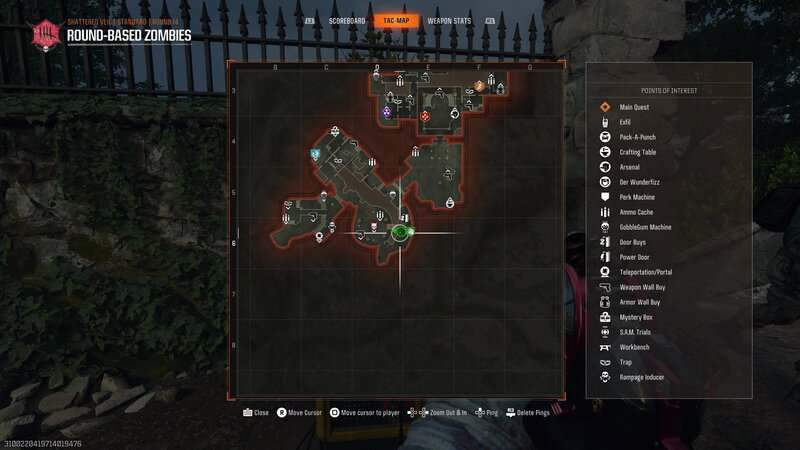
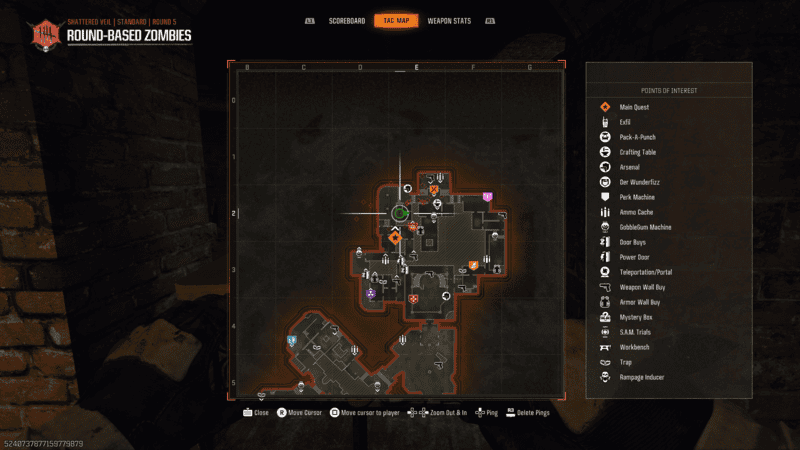
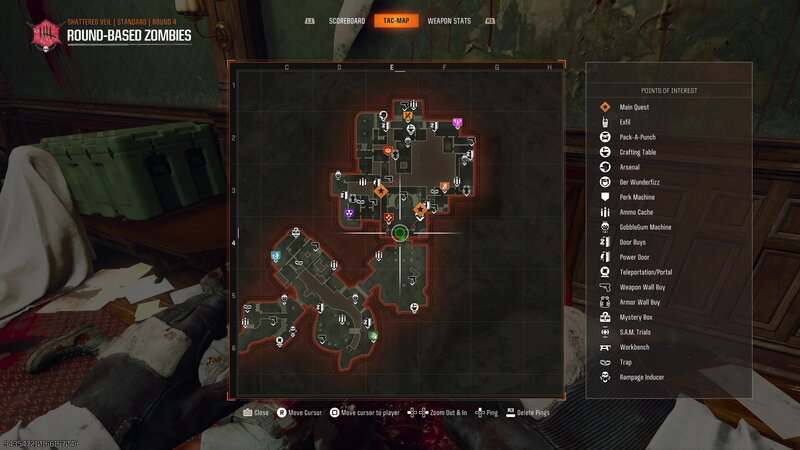
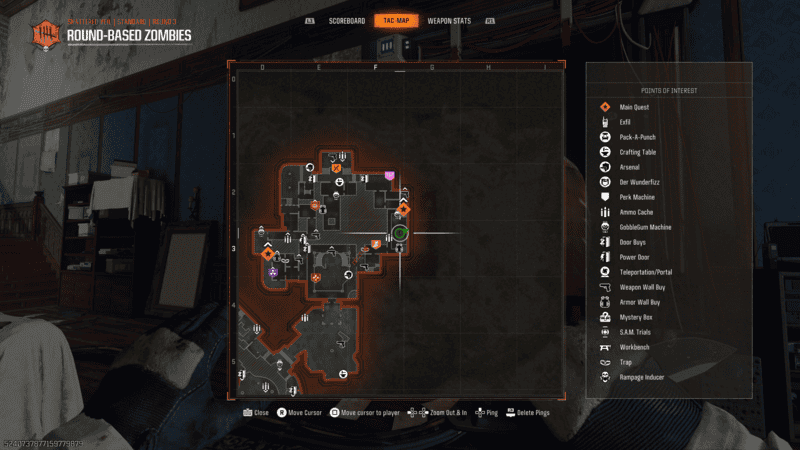
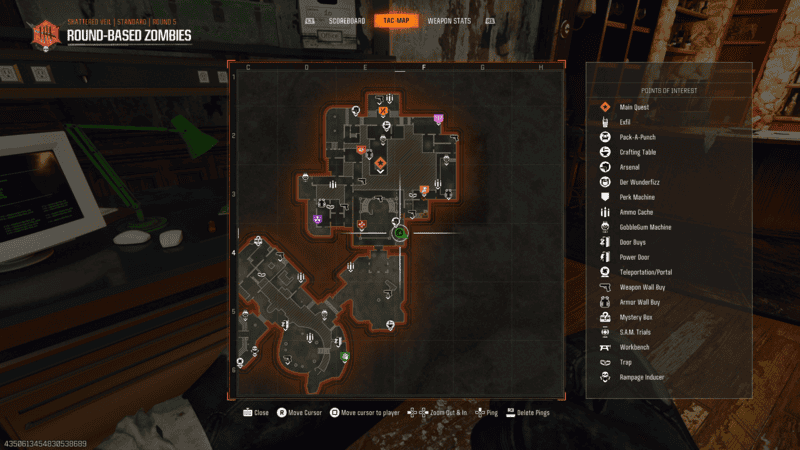
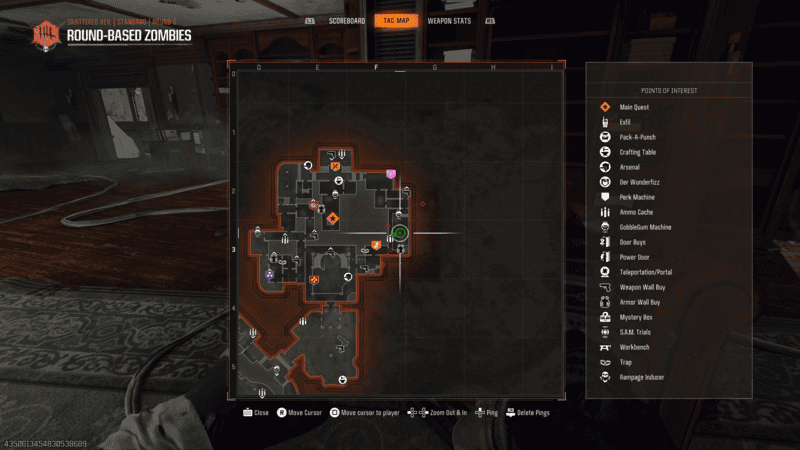
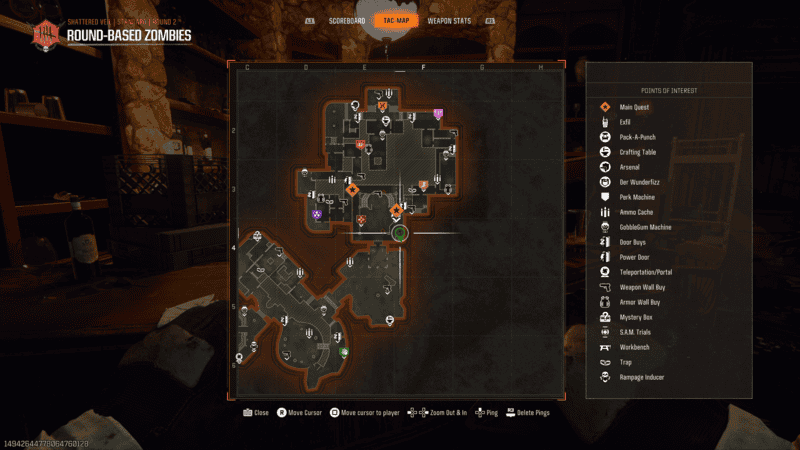
Meet S.A.M. in the Mainframe Chamber
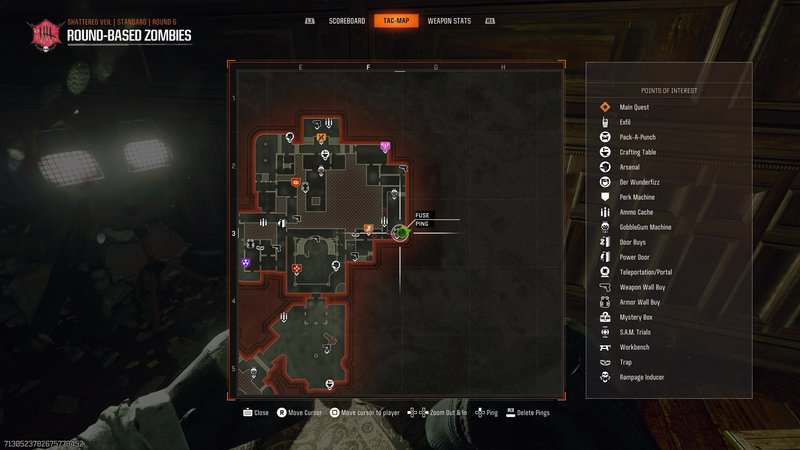
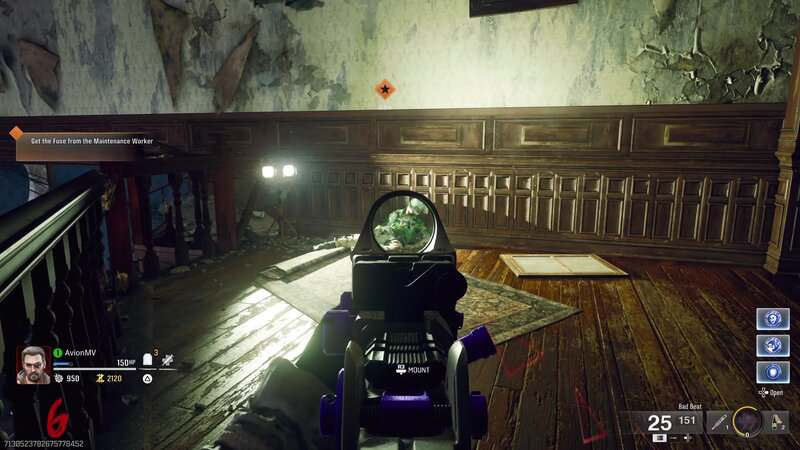
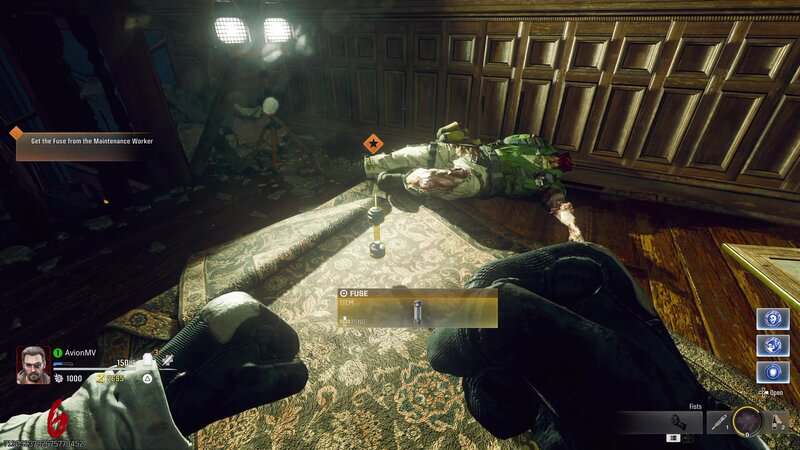
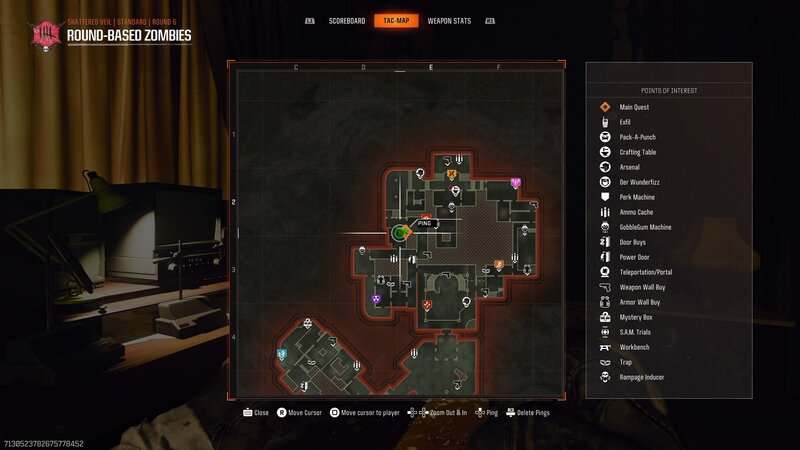
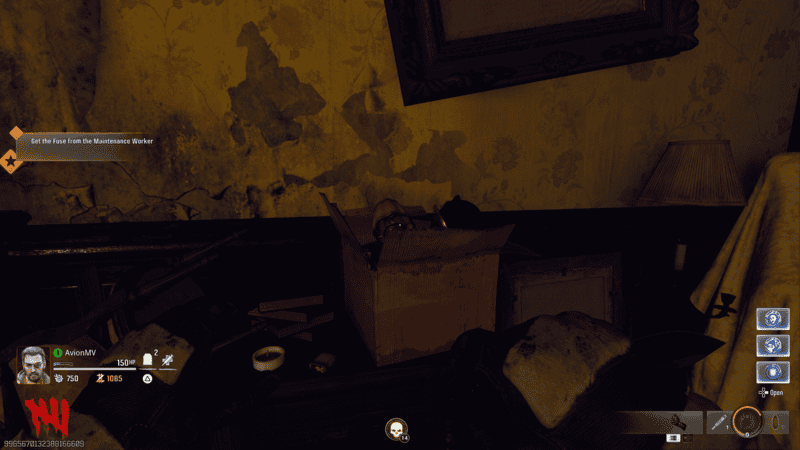
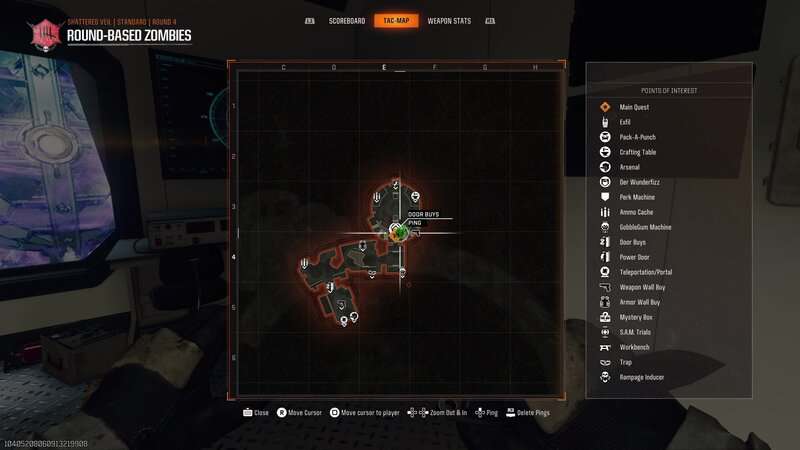
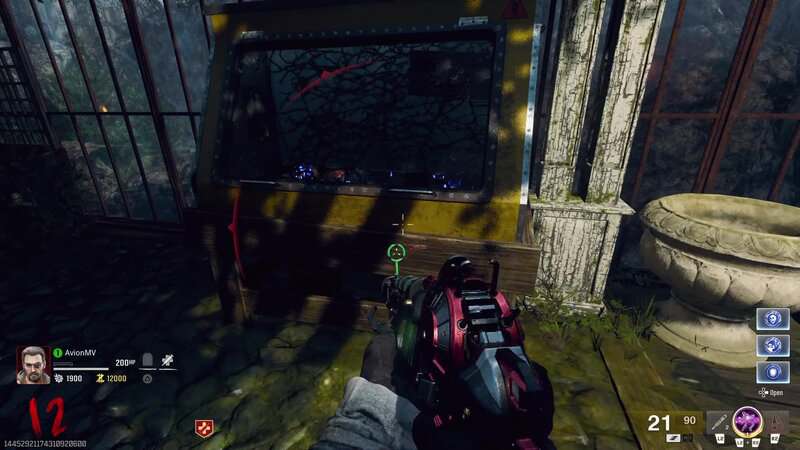
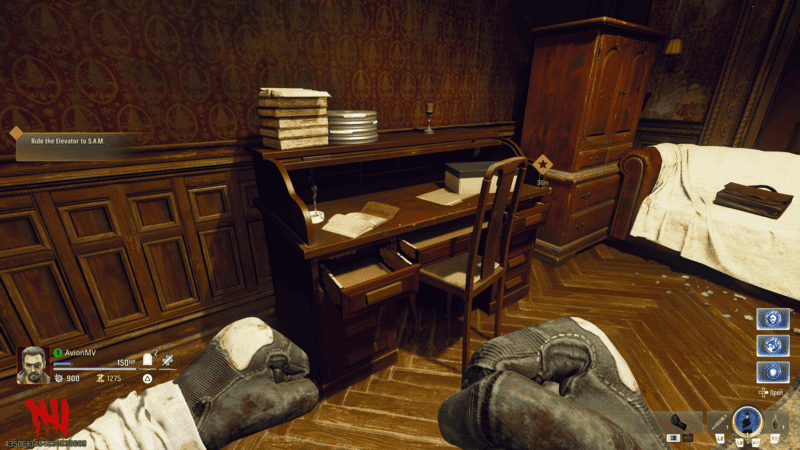
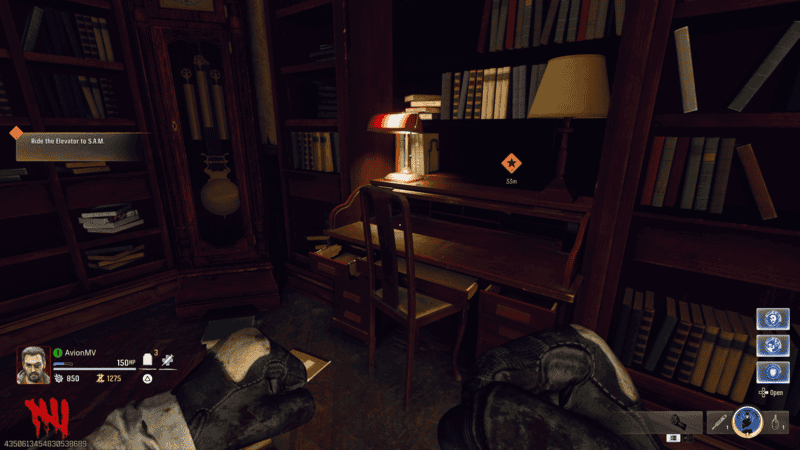
Just like the other Easter Eggs in Black Ops 6 Zombies, the first step is to find the Pack-a-Punch machine which can be found in the Mainframe Chamber with the S.A.M. A.I.. Go into the mansion and look for two items to repair the elevator that leads to the secret facility beneath the manor. Go through the east path to find the Library. Go up to the second floor and go to the southeast corner to find a zombified Maintenance Worker. Eliminate the Zombies and it will drop a Fuse.
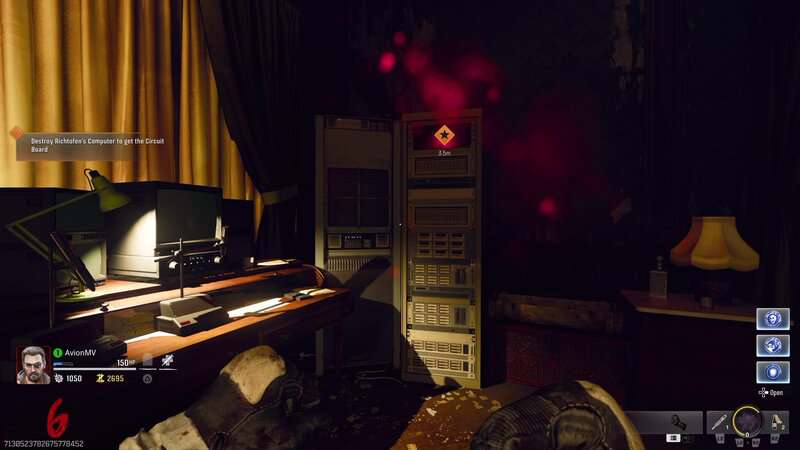
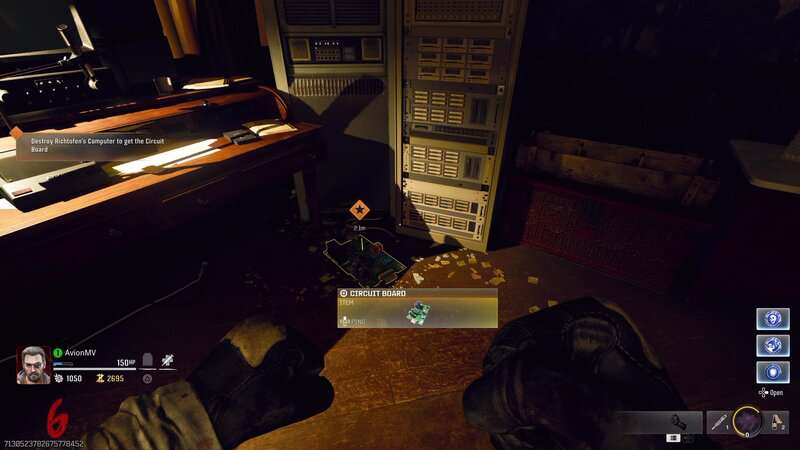
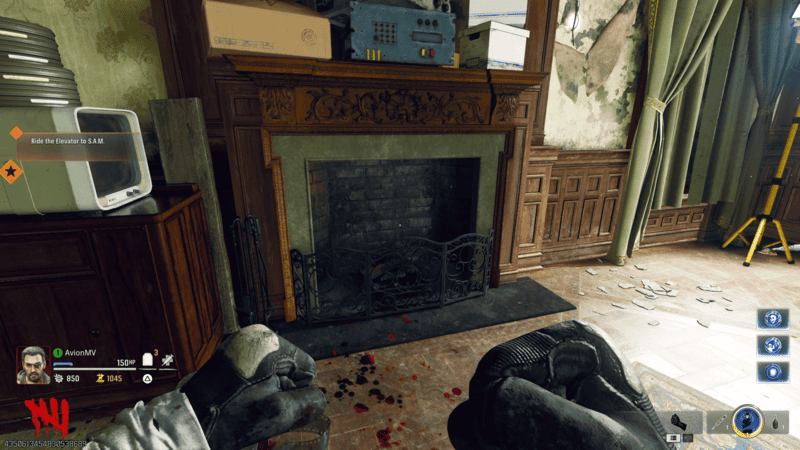
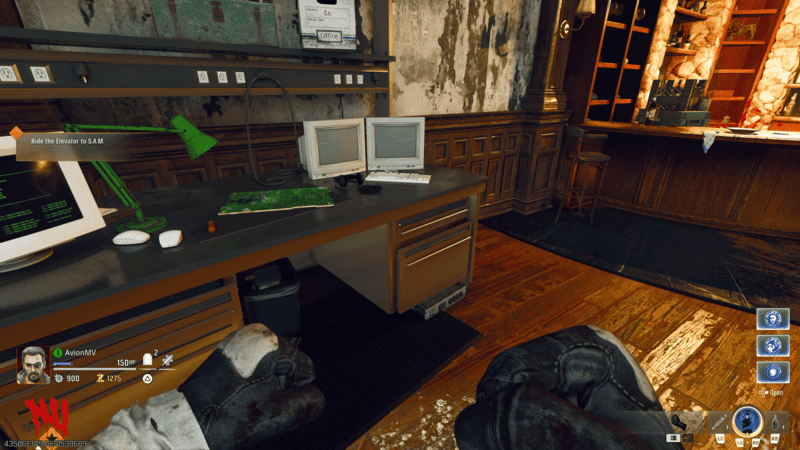
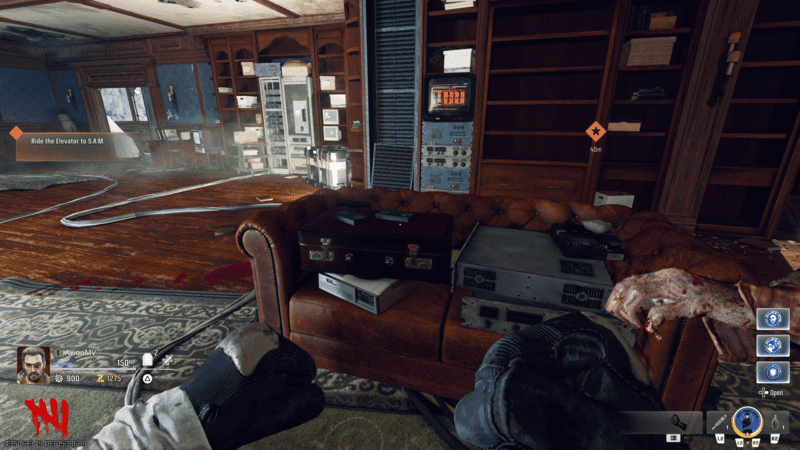
Now go to the west side of the mansion, go through the Nursery, and onto the West Balcony. From the Balcony, go back inside and through the door on the left to find the Director’s Room. Damage the computer in the corner of the room that has a red light pulsing in it. This will cause it to drop the Circuit board.
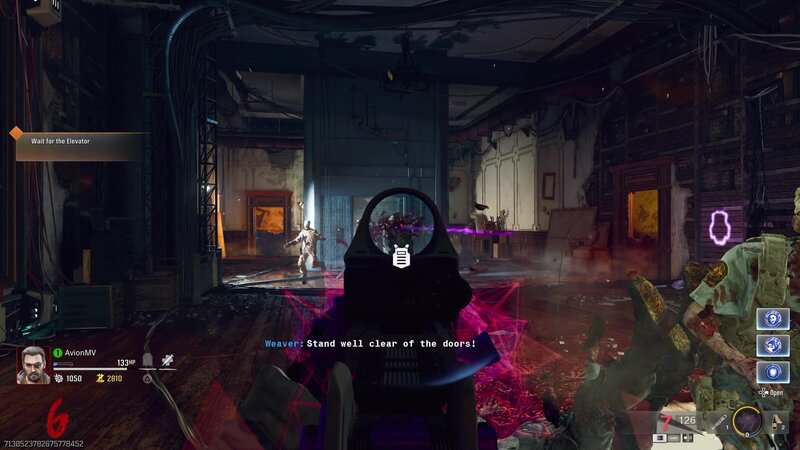
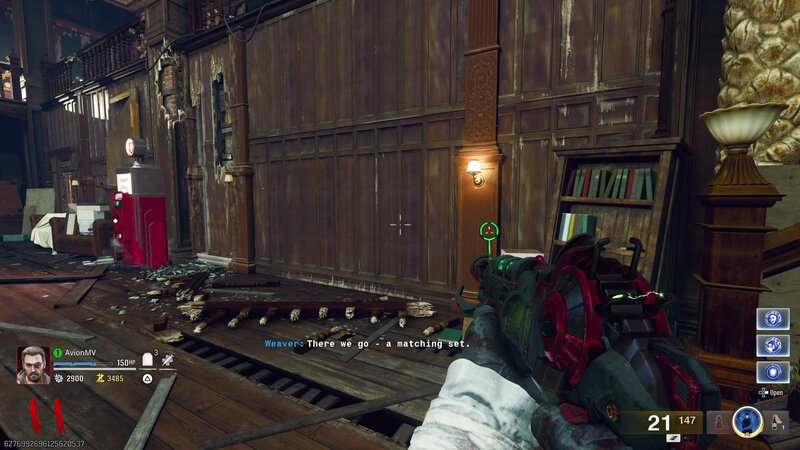
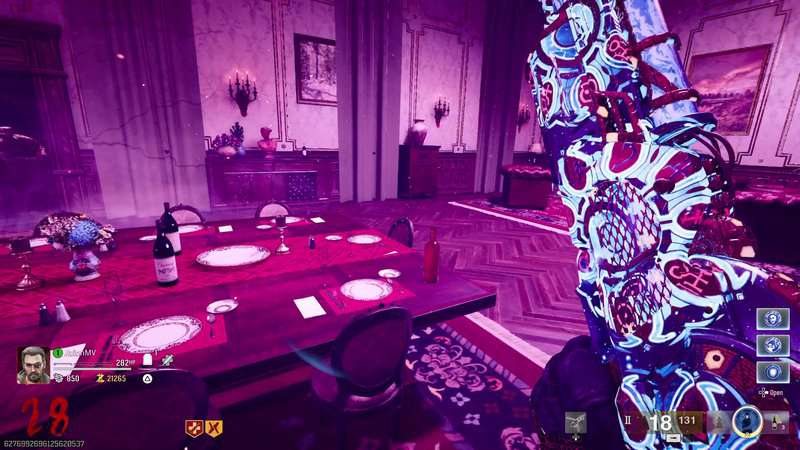
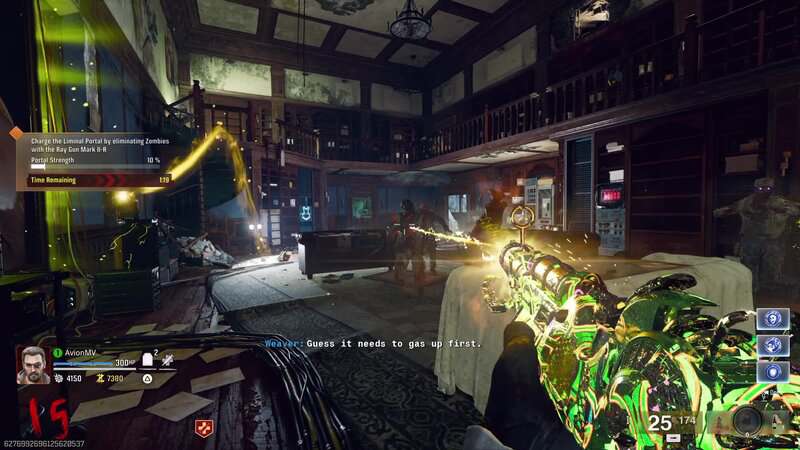
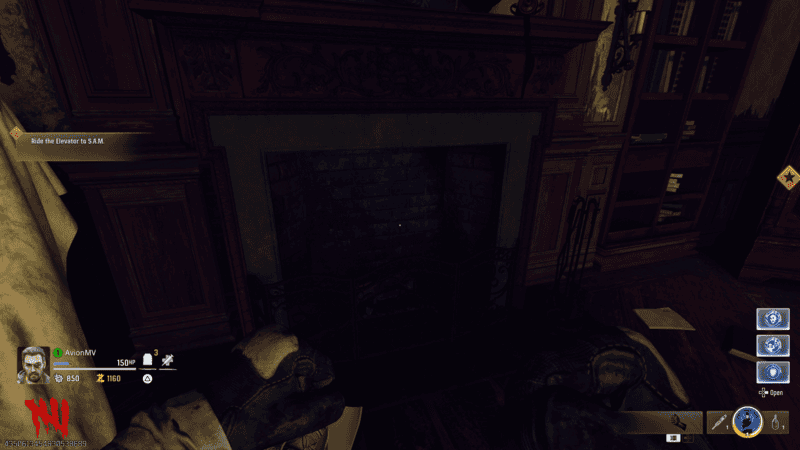
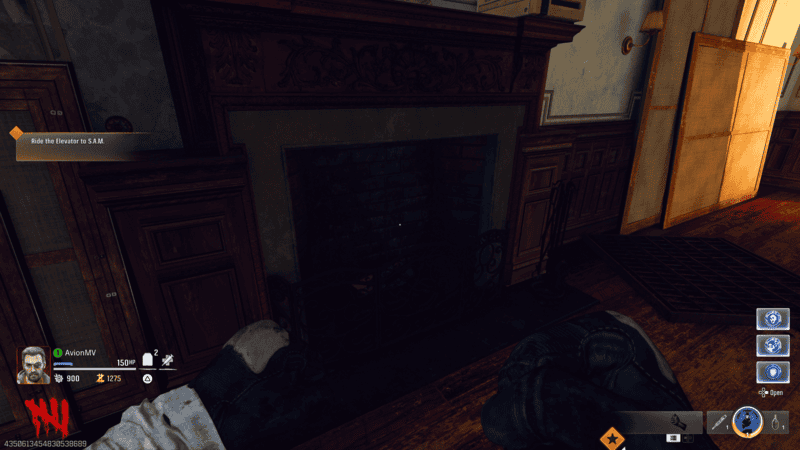
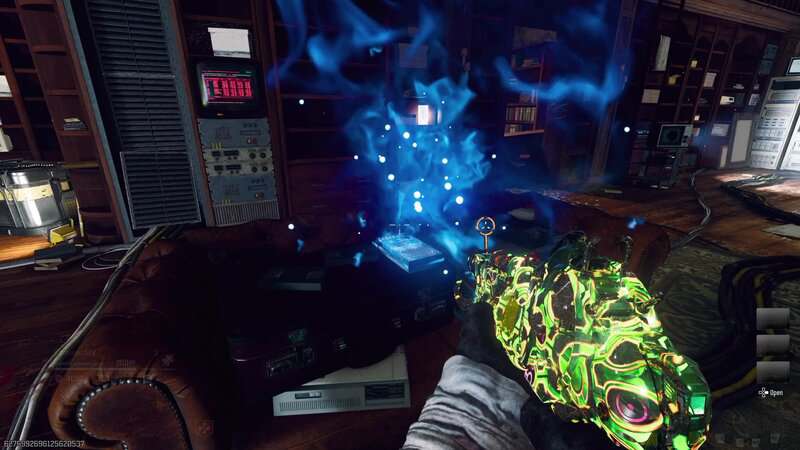
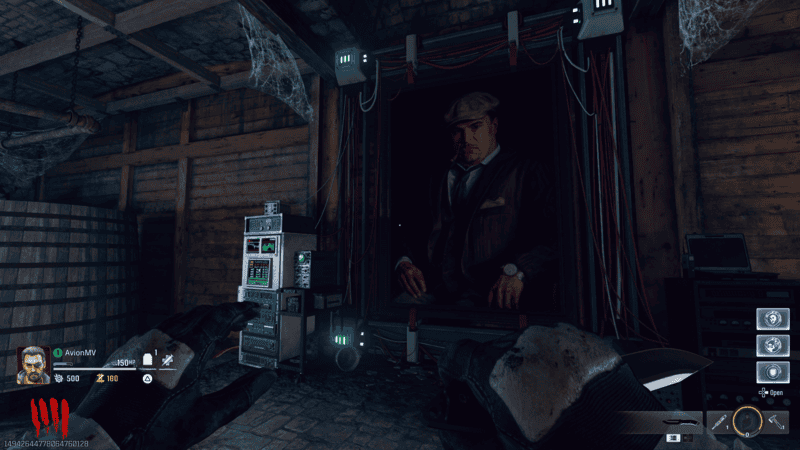
Now that you have these two parts, go to the Banquette Hall. You can find this room by going to the north end of the map and going through the doors opposite the Double Tap Root Beer Perk Machine. This is where you can find the elevator. Go to the back of the elevator and interact with an open panel to repair the elevator. Then, interact with the hand scanner next to the elevator door. This will open the door and a horde of Zombies will spill out. Defeat the undead and interact with the scanner again. The elevator will drop and you will be able to zipline down to the Mainframe Chamber and finally meet the S.A.M. A.I.

Use the Scone to Open the Distillery
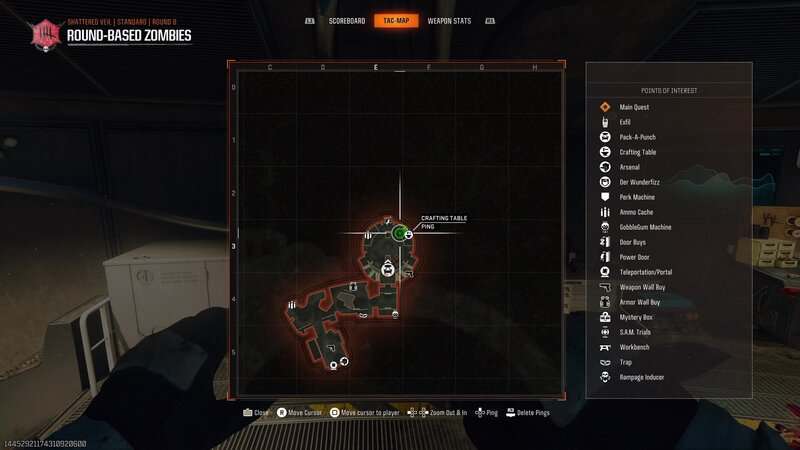
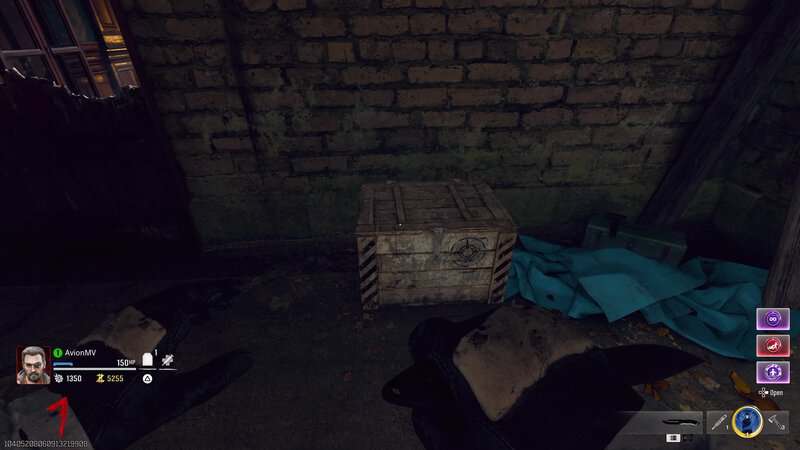
While this doesn’t need to be done right away, completing this step will unlock a secret underground area that will need to be accessed later in the quest so it’s good to get it done as soon as possible. Go to the Banquette Hall and look for a box in the northwest corner of the room. Interact with it to pick up the Scone.
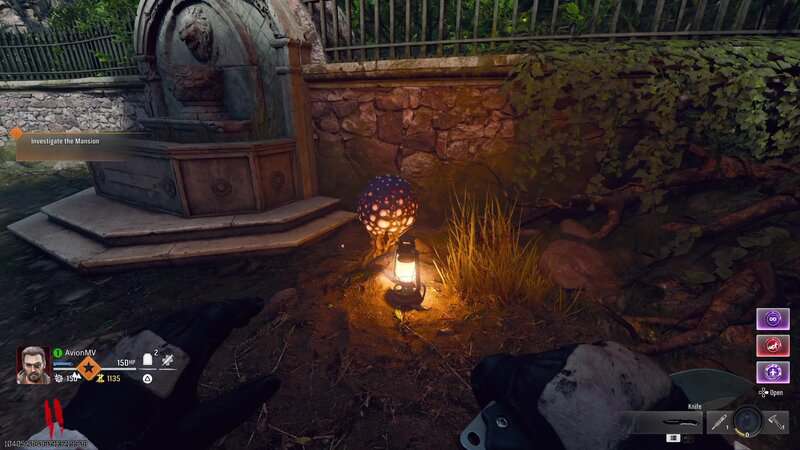
Go to the Grand Foyer and look to the right of the Juggernog Perk Machine. There is a lamp on the wall and an empty space to the right of it. Interact with the space to place the scone. You will now need to complete 3 rounds of Simon Says on these lamps to open a passage behind the wall between these lanterns. This will lead down to the Distillery.
Unlock the Ray Gun Mark II and All Variants
You will need to unlock all of the Ray Gun Mark II variants to progress through this Easter Egg Quest. This can be done by getting the original Mark II and then complete small quests for each upgrade.
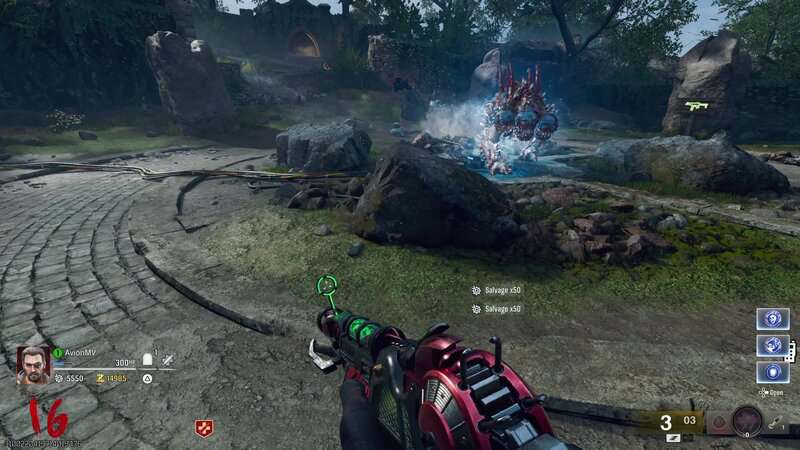
To get the original Ray Gun Mark II, you will need to progress to Round 10. Starting on this round, there is a chance that a unique Zombie named the Lab Technician will spawn in the Mainframe Chamber. This Zombie will have purple eyes and will drop the Floppy Disk item when killed.

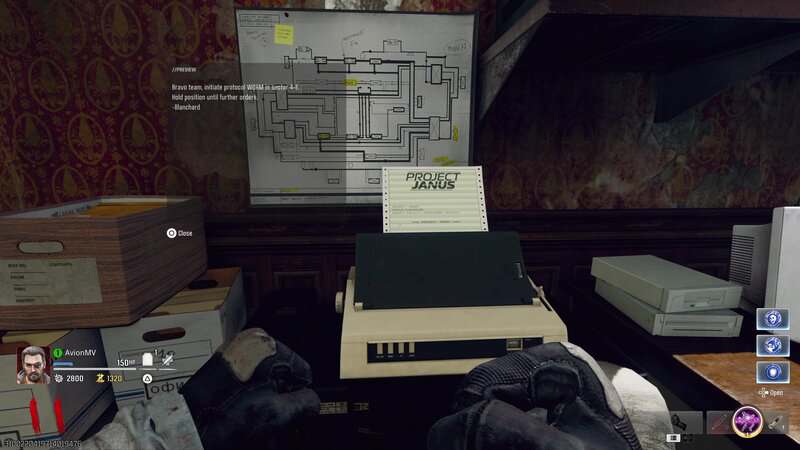
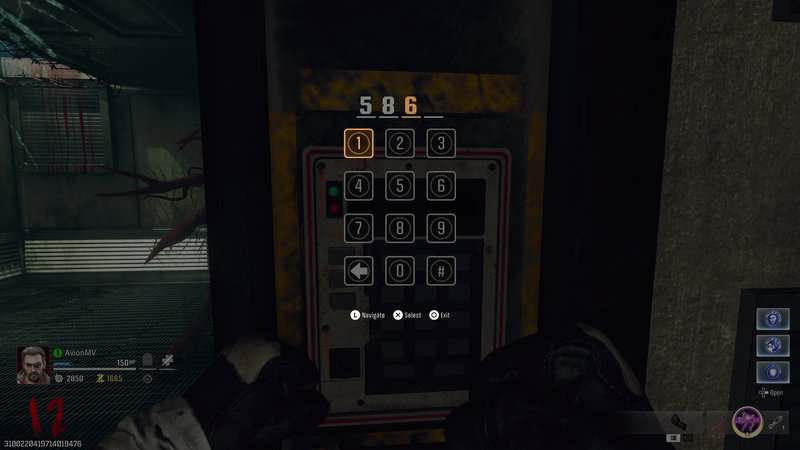
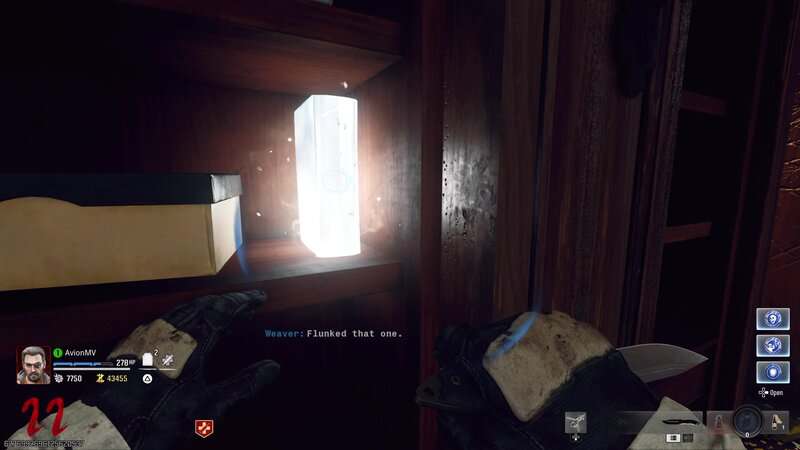
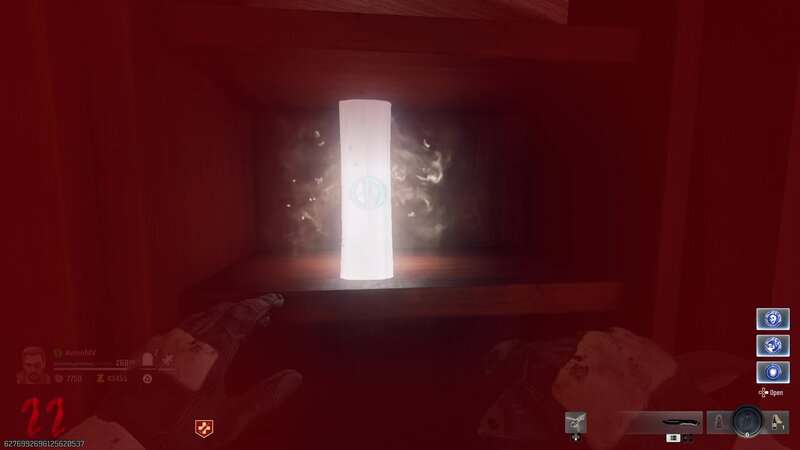
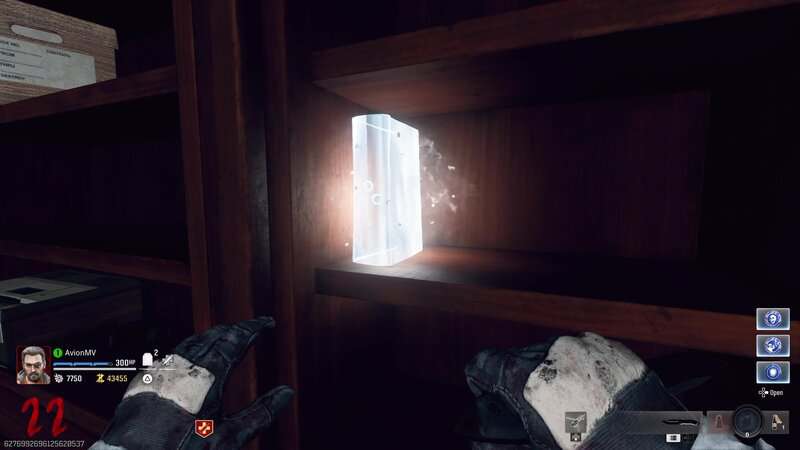
Now that you have the Disk, head back up into the mansion and go to the Easter Foyer. Go into the room south of the Stamin-Up Perk Machine. You will find a computer with a white screen next to a printer. When you interact with the computer, the screen will turn red and the printer will start up. A wave of vermin will spawn while you wait for the page to finish printing. Once the page is fully printed, you can interact with the page and a message from Blanchard will pop up. It will reference a protocol that will change each game of Shattered Veil. The code will be CRAB, YETI, or WORM.
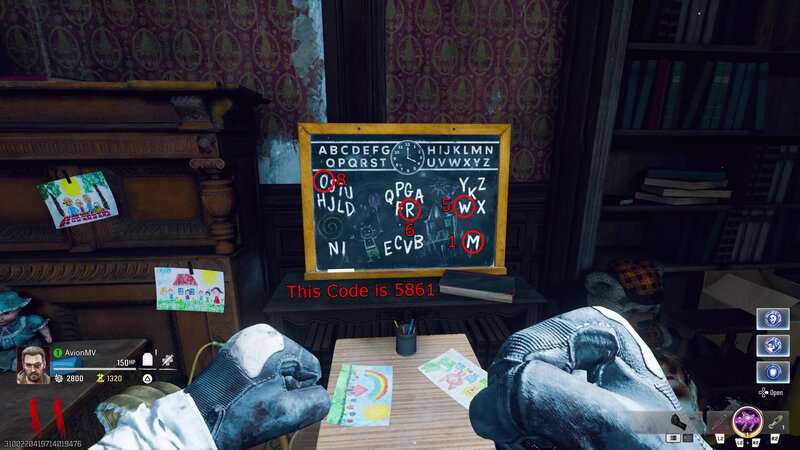
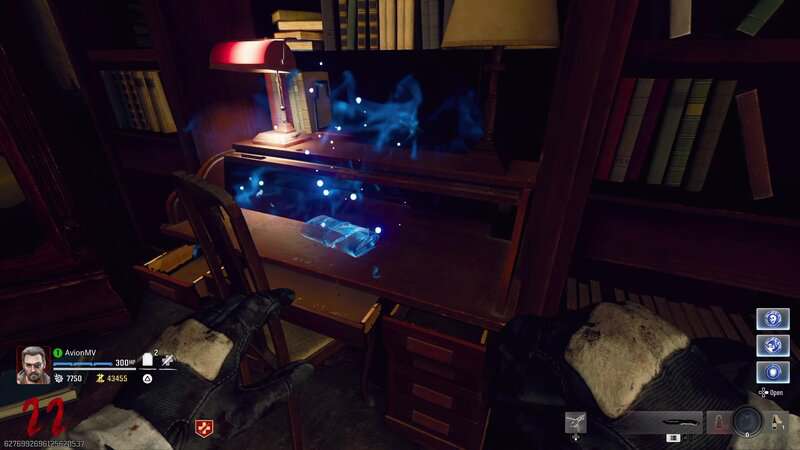
Go to the Nursery on the west side of the mansion and you will find a chalkboard to the right of the PhD Flopper Perk Machine. This chalkboard has letters separated into 6 different groupings. You need to find the letters from the name of the protocol shown on the page and then count how many letters are in its grouping. For example, the code I got in the images below was WORM. The “W” was found in the top right group, which had 5 letters. This means the first number for the code is 5. Going through the rest of the word, we find the code for this game is 5861.

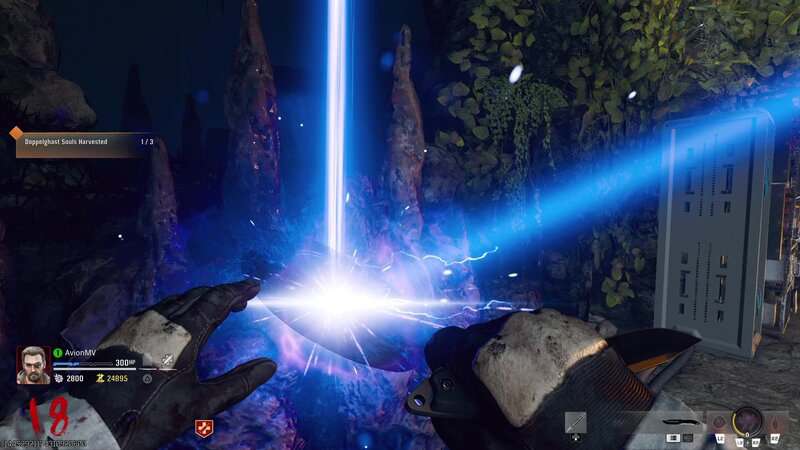
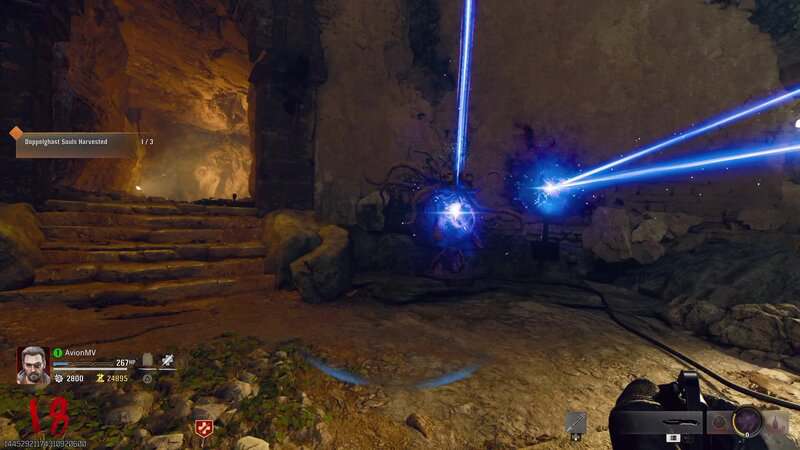
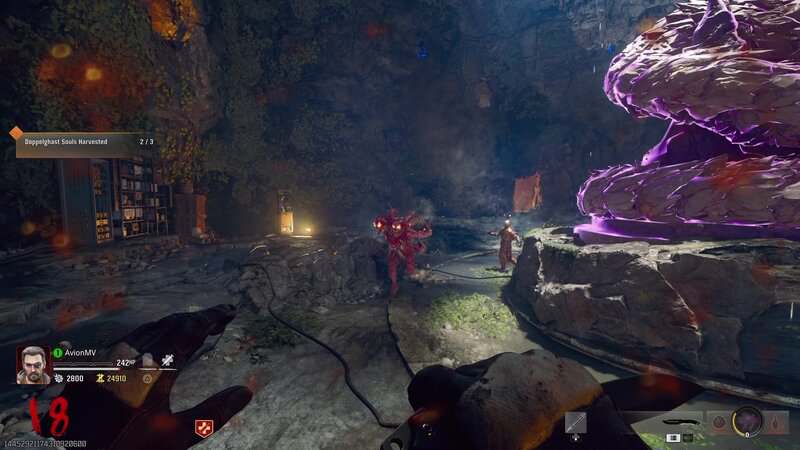
You will use this code to open a cell found underground. Go through the Mainframe Chamber and into the service tunnel to find a cell with an HVT Doppleghast imprisoned inside. To the right of the door is a number pad that you need to enter the translated code into. This will open the cell and release the Doppleghast.
Defeat the Doppleghast and it will drop the Severed Arm item. You will need to unlock a case containing the Ray Gun Mark II.

With the arm acquired, go to the Supply Depot near the underground teleporter. There is a door here that leads into the Armory. There is a glass case in the Armory that has the Mark II locked inside. Use the Severed Arm on the scanner to open the case and gain access to the Mark II. Only one player in a game can get this free Ray Gun Mark II.
All Empty Canister Locations
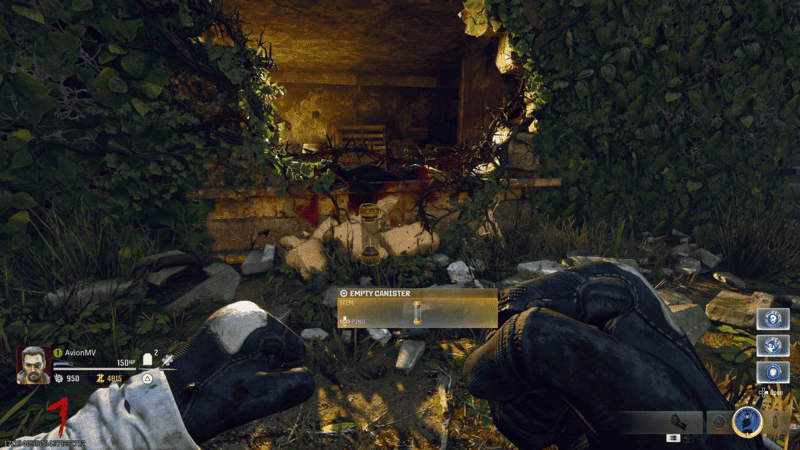
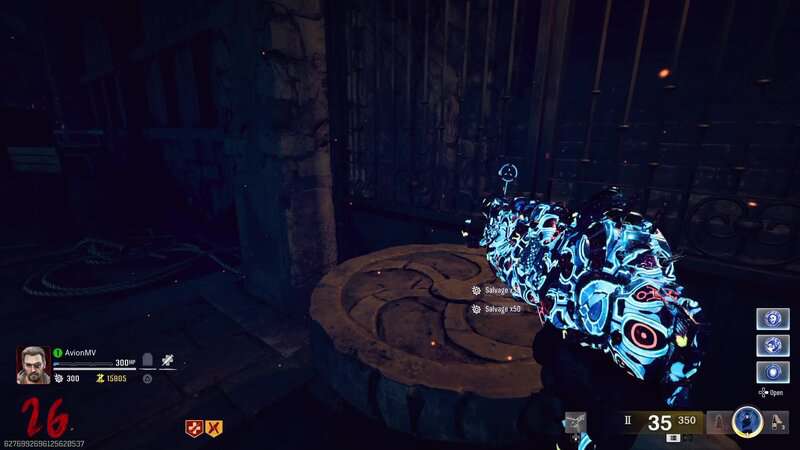
Each Ray Gun Mark II upgrade requires you can find an Empty Canister. There is a total of 3 of these Canisters. Each one requires some Equipment or a specific weapon to acquire. This breakdown will show you where to find the canisters, as well as some spawn locations for the Equipment needed to get them. Each canister can be used for any Mark II upgrade quest.
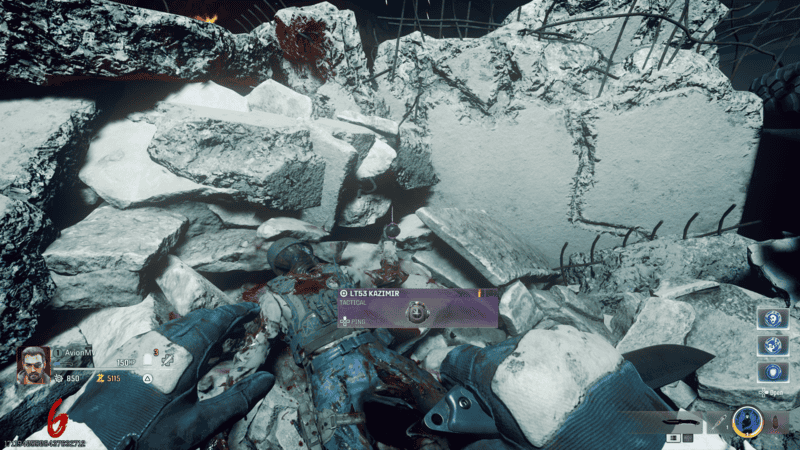
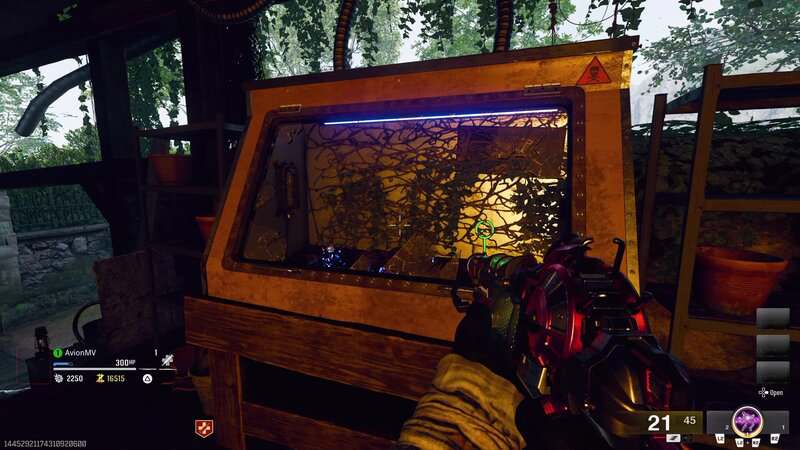
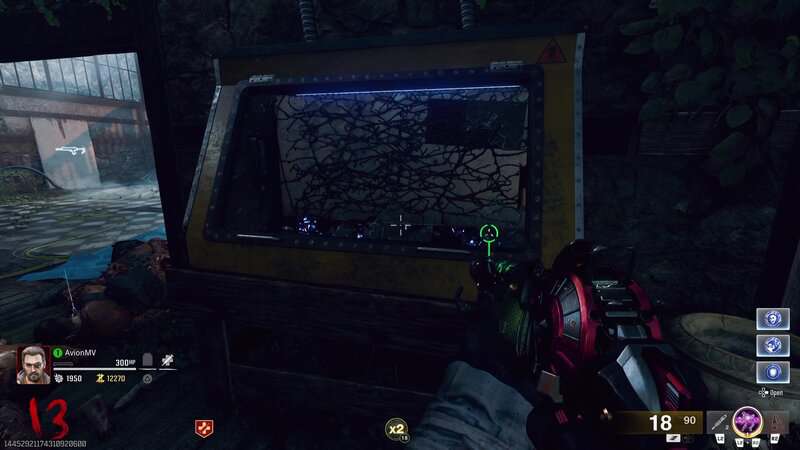
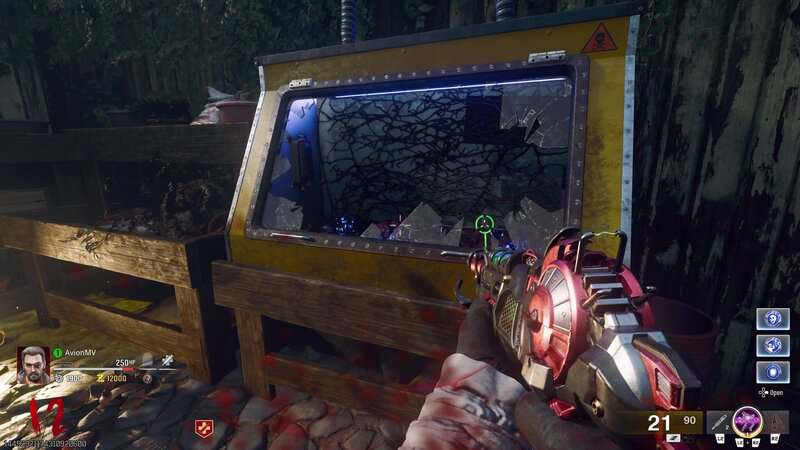
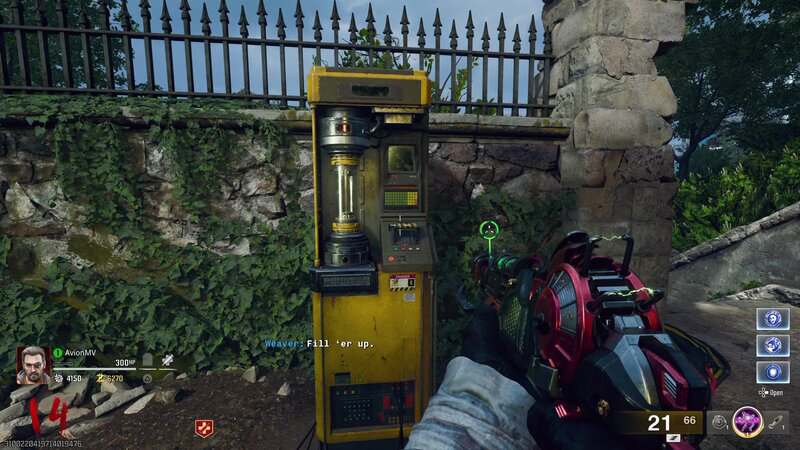
One of the canisters can only be acquired by using an LT-53 Kazimir Tactical grenade. You can hope to get lucky and wait for a Zombie to drop one, or you can craft one at a Crafting Table for 1.500 Salvage. There is a free Kazimir you can use by going down to the underground Service Tunnel. In the middle part of the tunnel, next to a crashed truck, is a corpse holding a Kazimir.
When you get a Kazimir, go to the Rear Patio and look for a window under the Double Tap Root Beer Perk Machine. You can see the Empty Canister sitting on a barrel in the window. Throw the Kazimir in front of the window to suck up the Canister. When the Kazimir ends, the Canister will drop to the ground.
The next Canister requires the use of at least 2 Combat Axes. Like the Kazimir, you can wait for a Zombie to drop one but there are 3 Axes that can be picked up around the map. One Combat Axe is in the Garden Pond spawn room on a log in the west end of the area.
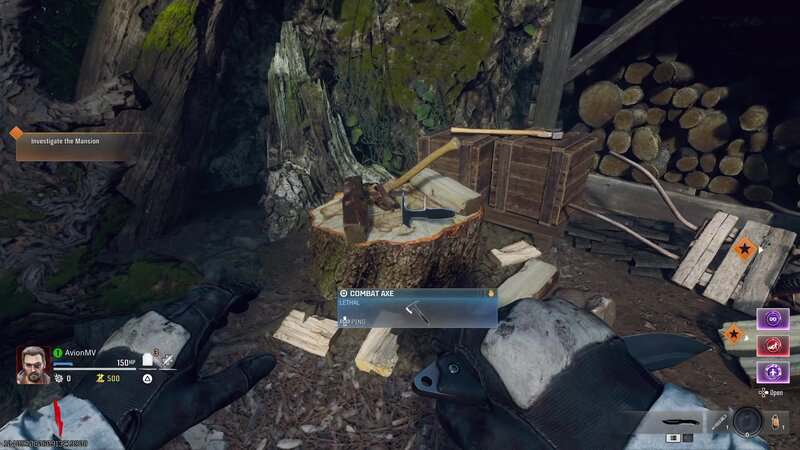
Another Axe is found under the bed in the Nursery.
The last Axe is on a table to the right of the Pack-a-Punch machine in Security Overlook.

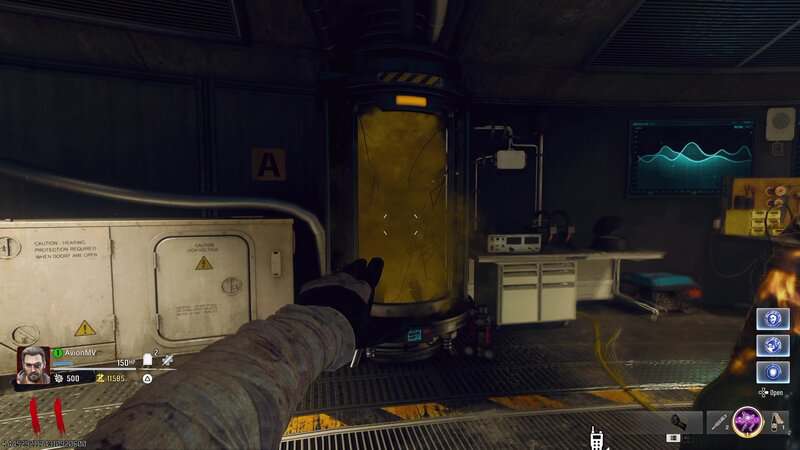
Now that you have 2 Combat Axes, go to the Mainframe Chamber and look to the left of the elevator. You will see a tube with a dead body inside and the Empty Canister as well. To the left of this tube is a letter written on the wall. This will either be an A or a B and will change every game you play.
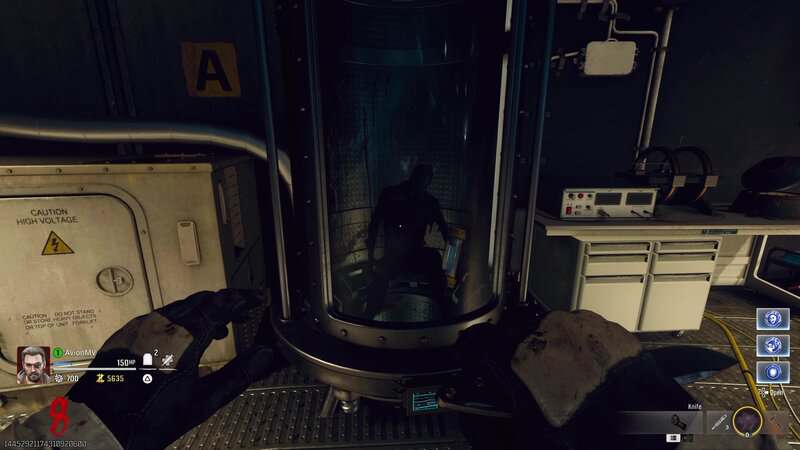
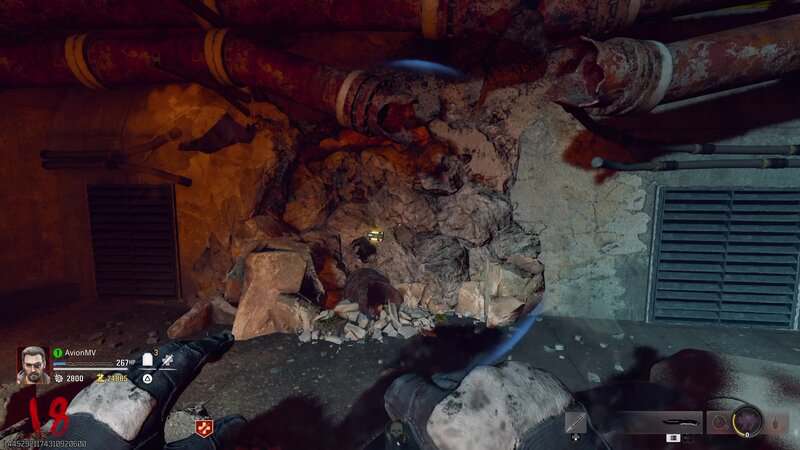
Go through the Mainframe Chamber hallway and into the Service Tunnel. Look to the left of the cell with the Doppleghast. Outside the map, you will see a pipe with a few valves along it. The leftmost valve will have gas leaking out of it. You will need to direct this gas through the pipe with the letter next to the tube. You do this by throwing a Combat Axe at the middle valve and then at the valve next to the letter that was next to the tube. Gas will then come out of the pipes and you will get a voiceline from S.A.M..

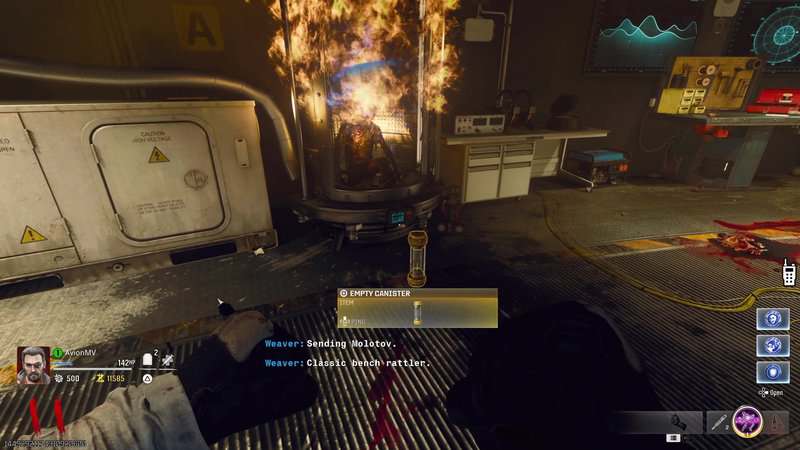
Return to the tube in the Mainframe Chamber and you will see it has filled with gas. Use any weapon that does explosive damage to destroy the tube. This will release the Canister and allow you to pick it up.
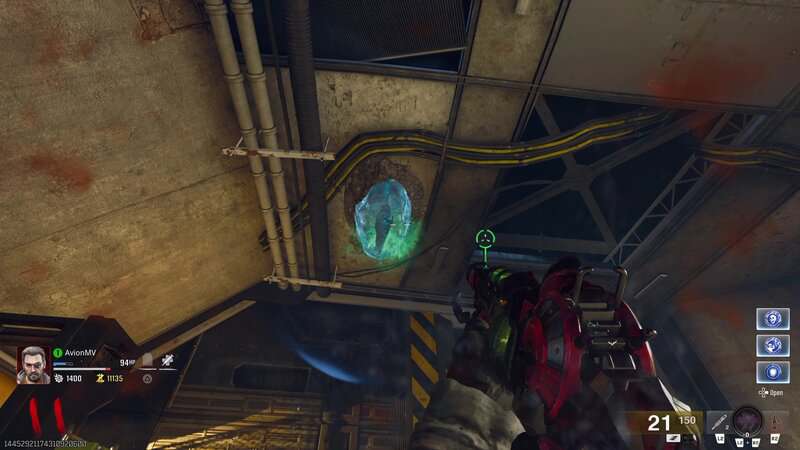
The last Canister can only be acquired after getting a Ray Gun Mark II. Once you have the Wonder Weapon, you need to track down Blue Crystals found around the map. These Crystals will spawn in the same locations every game and must be shot with the Mark II to break them. The first one is found on the roof in the southwest corner of the Service Tunnel.
Another is round on the roof of the Conservatory.

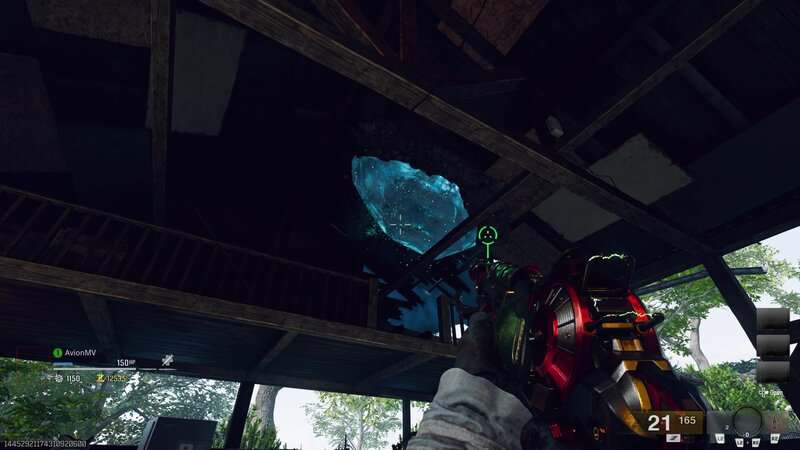
Another is on the wall in the East Foyer in the room south of the Stamin-Up Perk Machine.

The Last one is on the wall outside the Nursery to the south of the PhD Flopper Perk Machine.
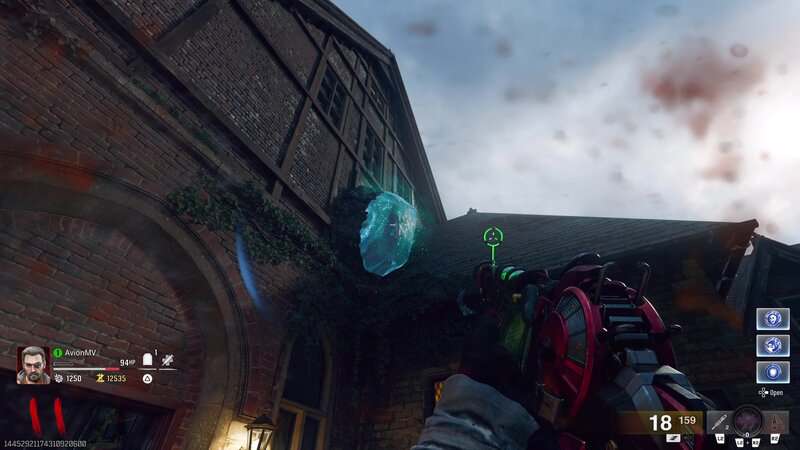
Each of the crystals will drop loot when destroyed, with one of them giving you the Empty Canister. The crystal that the Canister is found in will be different every game.

Ray Gun Mark II-P
To get the Mark II-P, you will need to find two mirrors called Reflectors that are hidden around the map. These Reflectors will spawn in the same locations every time you play Shattered Veil and they can be collected at any time.
One Reflector is in a fountain outside the Conservatory to the right of the Quick Revive Perk Machine.
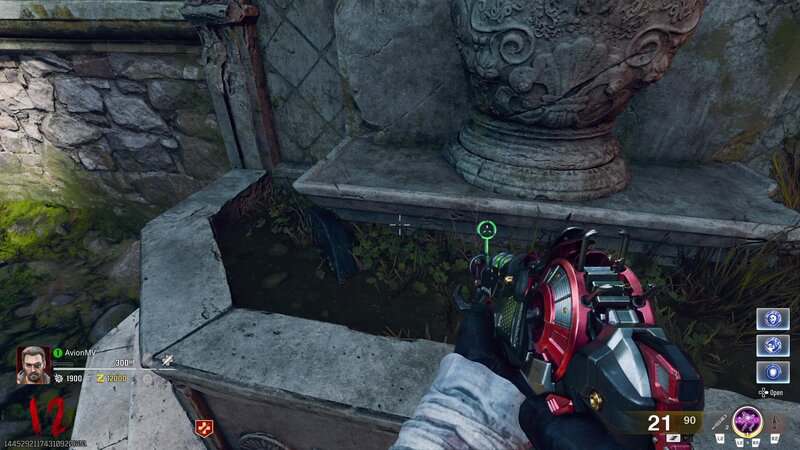
The other Reflector is in a fountain outside the Nursery to the west of the PhD Flopper Perk Machine.

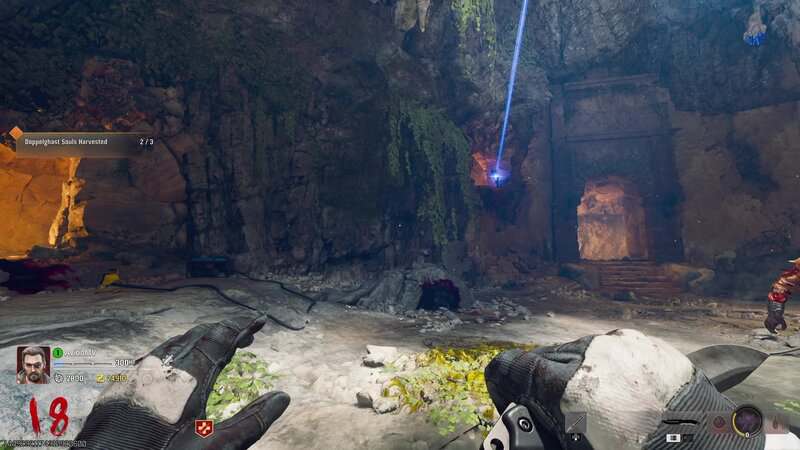
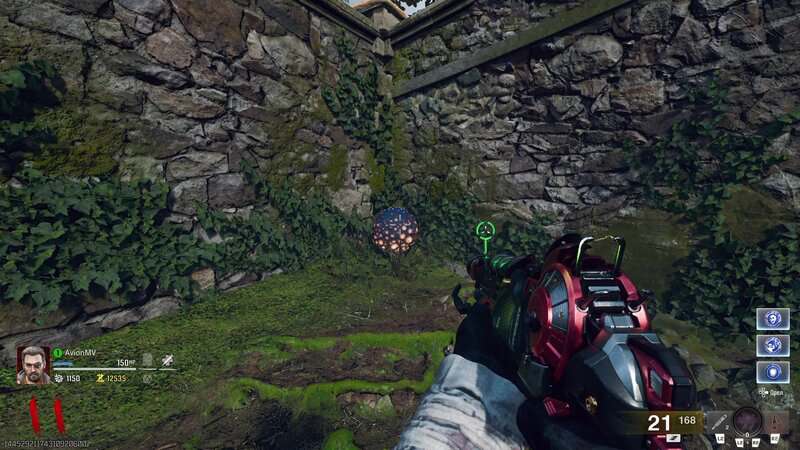
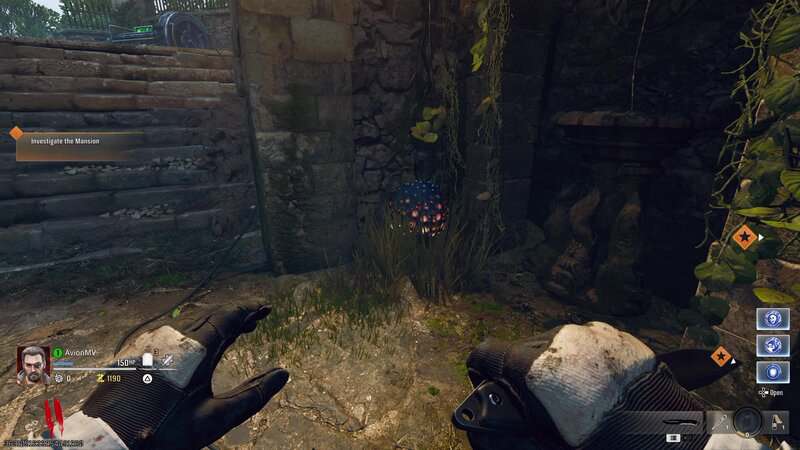
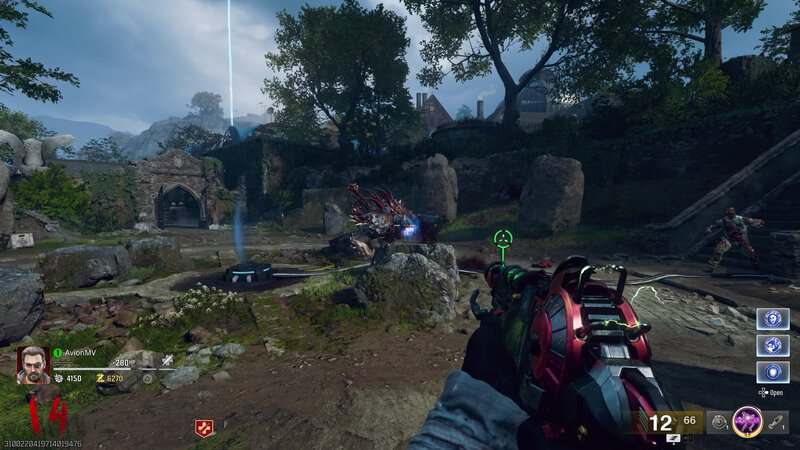
Now that you have the Reflectors, you need to gain access to the Serpent Mound secret cave. To access this area, you will need to find the Essence Bomb. This item can be found in one of the white Janus crates found around the map. These boxes will drop loot or spawn a Vermin when broken. When one box is broken, it will drop the Essence Bomb. This is random every game.
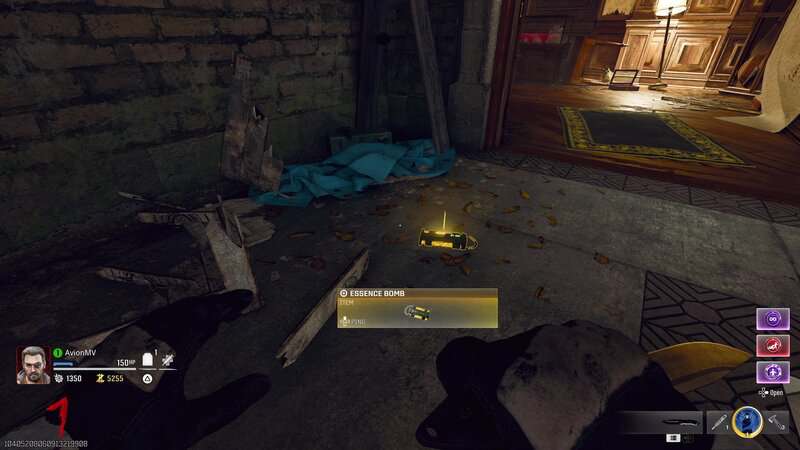
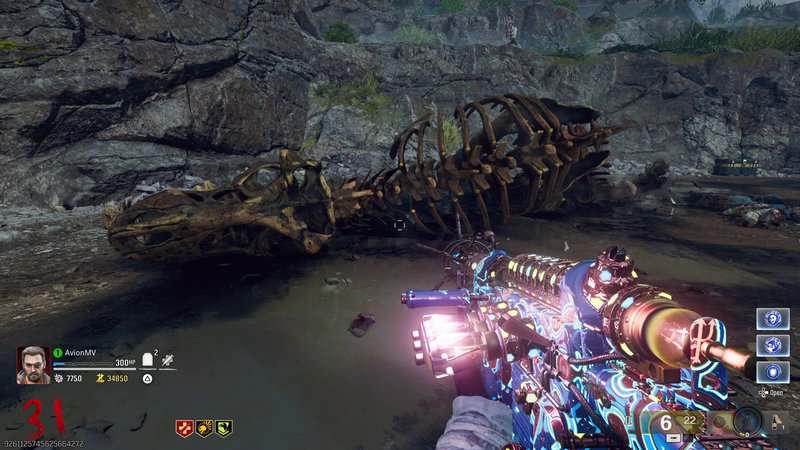
Go to the Service Tunnel beneath the mansion and go to the left of the Level 3 Armor Wall Buy to find some rubble in the wall. Interact with it to plant the bomb. This will open a passage down into a secret cave with a large statue of the Greylorm boss from Modern Warfare Zombies.

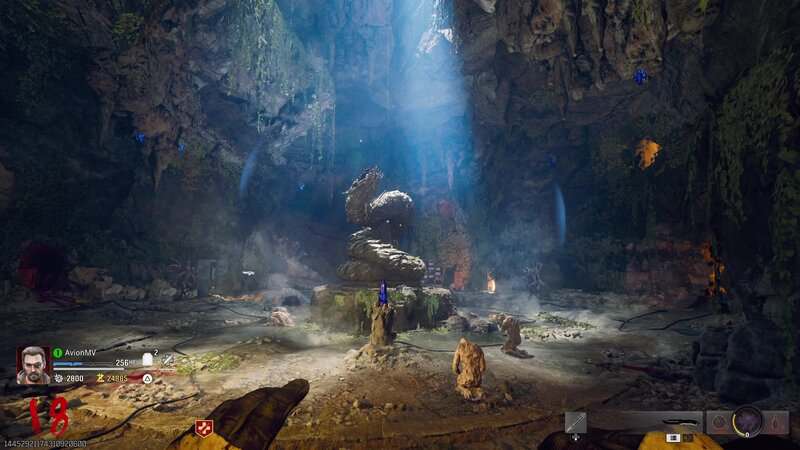
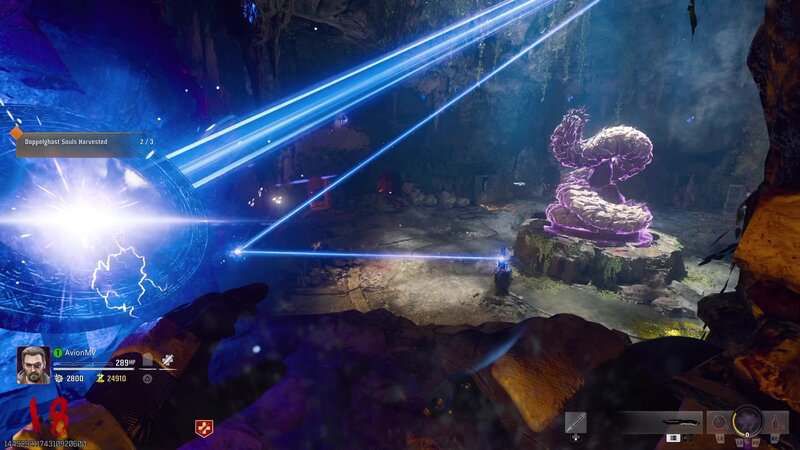
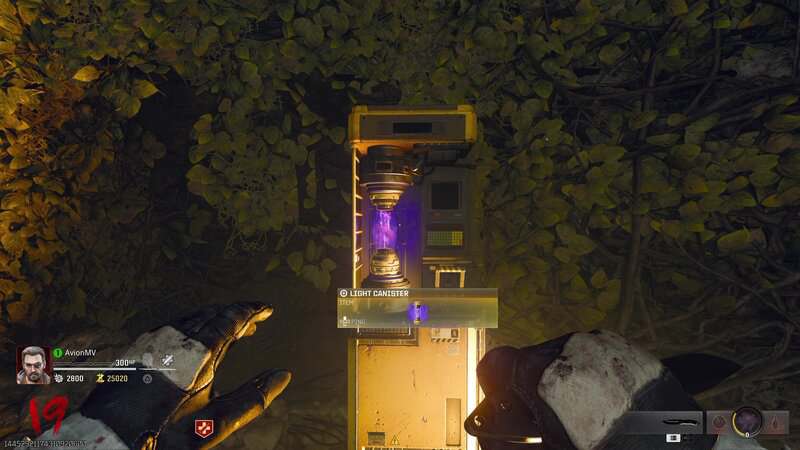
Go to the wall opposite the entrance to the cave and then look right to find a canister charging station. You can put an Empty Canister in this machine.

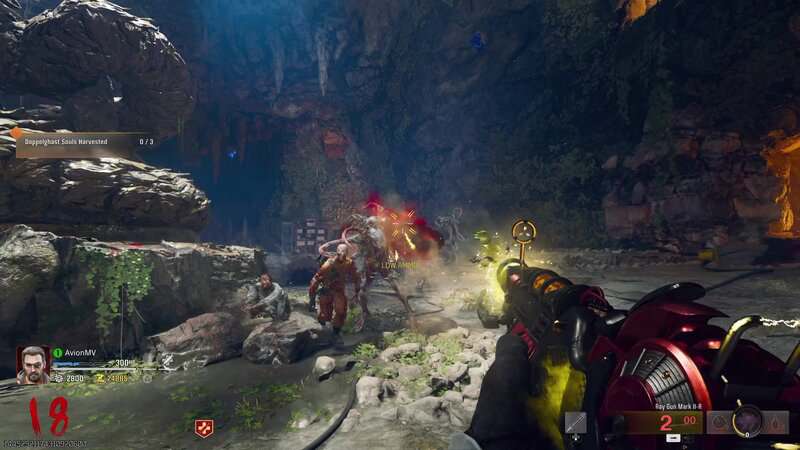
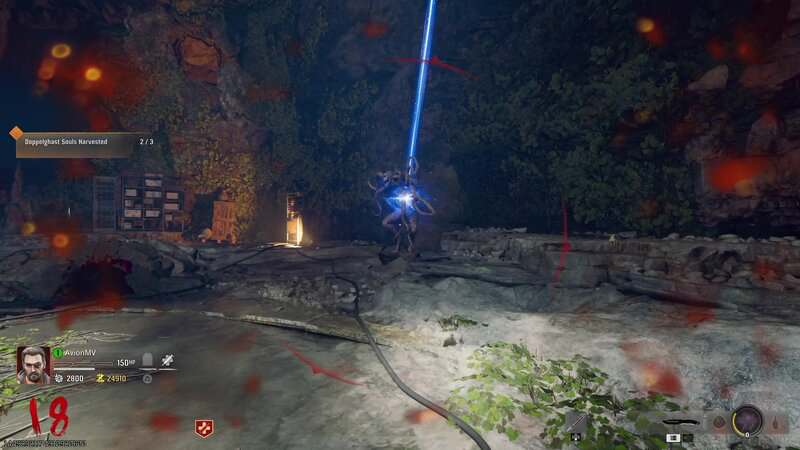
When the Canister is inserted into the machine, a beam of light will come from a crystal near the center of the room. You will need to direct this light to the 3 Doppleghast statues around the room. You can do this by using the Reflectors. Follow the beam of light to a stand near the cave’s entrance. Interact with the stand to place a Reflector. Melee the Reflector twice and it will send the beam to the Doppleghast statue at the south end of the room. Melee the crystal that the light is coming from to send an orb through the light. When it hits the statue, it will spawn a Doppleghast. Defeat the Doppleghast to complete this step.
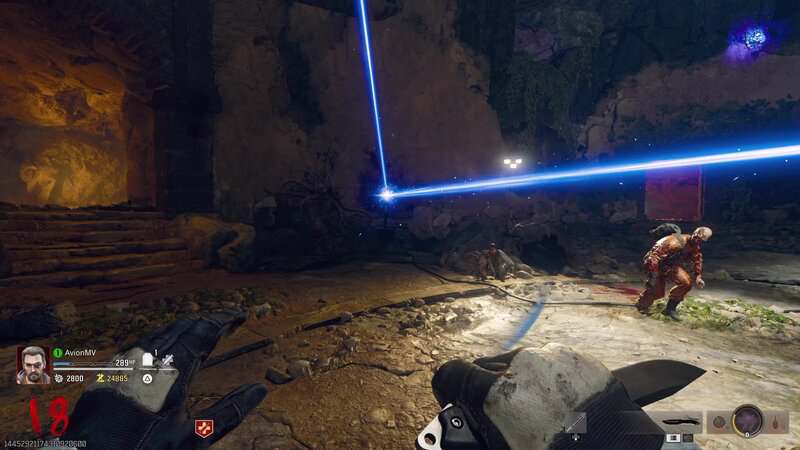
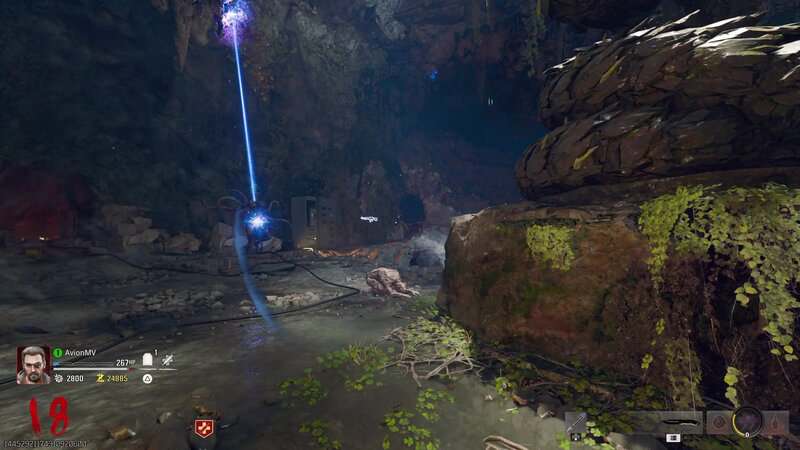
Melee the Reflector to send the beam of light to a second stand at the west end of the room. Place your second Reflector here and it will send a beam of light to the Doppleghast statue near the cave’s entrance. Melee the crystal and defeat the Doppleghast that spawns from the statue.
Pick up the second Reflector and melee the first Reflector once to send the light up to an opening in the wall. Go through a passage at the north end of the room and follow the path up to reach a third stand. Place a Reflector here and melee it once to send the beam of light to the last Doppleghast statue at the north end of the room. Melee the crystal. This will release a HVT Doppleghast so it will be tougher the the ones you fought before.
Once all 3 Doppleghasts are defeated, the Empty Canister will be charged and will become the Light Canister. Go back to the charging machine and pick up the canister.
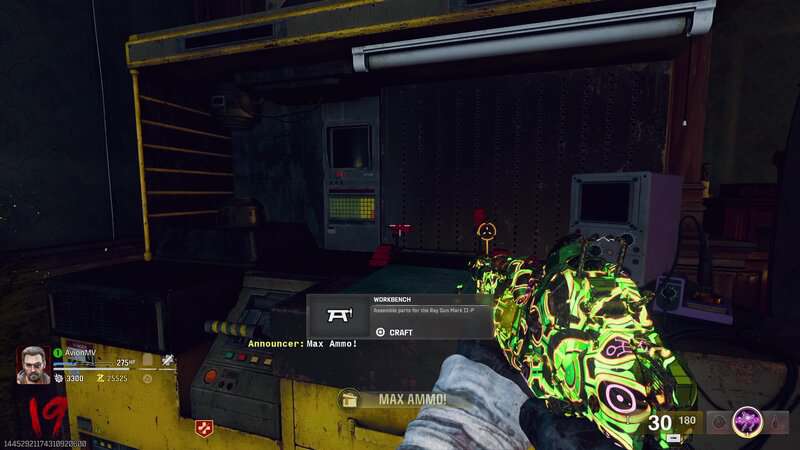
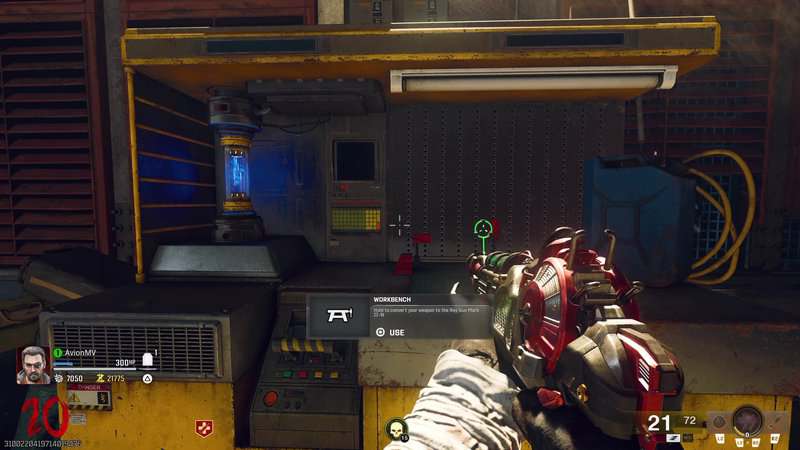
Go to the Director’s Office and interact with the yellow workbench to insert the Light Canister into it. Interact with the workbench to craft the Ray Gun Mark II-P.
Ray Gun Mark II-R
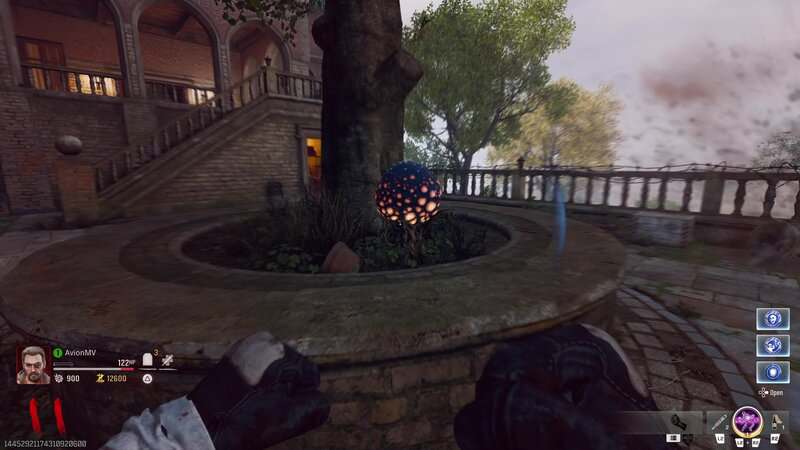
To get the Mark-R, you will need to first collect 4 Plant Seeds that can only be acquired by destroying spores with a specific type of damage. There are 9 locations where these spores have a chance to spawn, with only 4 spores appearing each game. These locations will change every time you play Shattered Veil. Here is a breakdown of each possible spore location on Shattered Veil.
In the Garden Pond spawn room. Go to the corner to the southeast of the bridge to find this spore.

Also in the Garden Pond. Go to the bottom of the stairs to the right of the Aether Field Generator trap.
To the right of the fountain outside the Conservatory.
Next to the eastern stairs in Shem’s Henge.
In the Motor Court right outside the mansion. Go to the southwest corner next to the Crafting Table to find this spore.
Also in the Motor Court. Look to the left of the mansion’s entrance.

Go to the South West Balcony outside the Nursery to find this spore on a crate.
Go to the West Balcony to find this spore at the base of a tree.
Go to the northeast corner of the Rear Patio to find this spore.
Hit these spores with explosive damage to release a Plant Seed. You will need to destroy all of these spores and collect 4 of these Seeds.

Go to the top floor of the Conservatory and in the middle of this area will be a canister charging station. You can put an Empty Canister in this machine.

Once you have put the canister in the machine, you can put the Plant Seeds in the containers with the blue UV light that are found around the Conservatory. Interact with these containers to plant a seed. It will start to grow and Zombies will try to attack it. If it gets attacked enough, the seed will pop out and you will need to start over. You will need to a Plant Seed to fully grow into a spore at each container to complete this step.

Once all the plants grow into spores, your Empty Canister will be charged, becoming the Toxic Canister. Go back to the charging machine and pick up the canister.
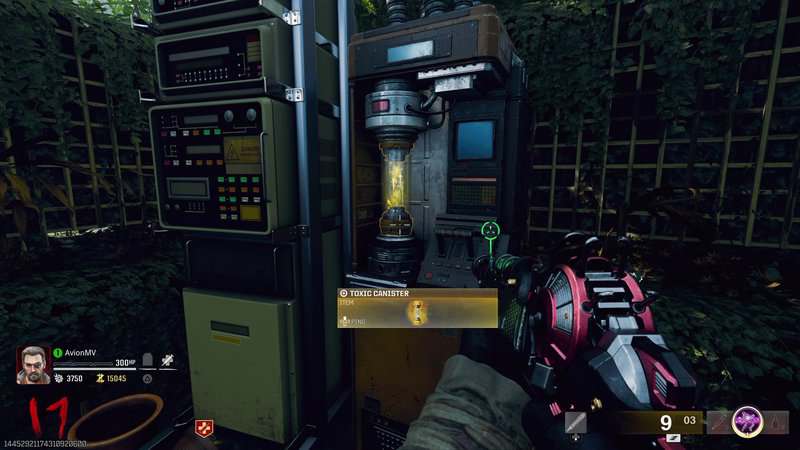
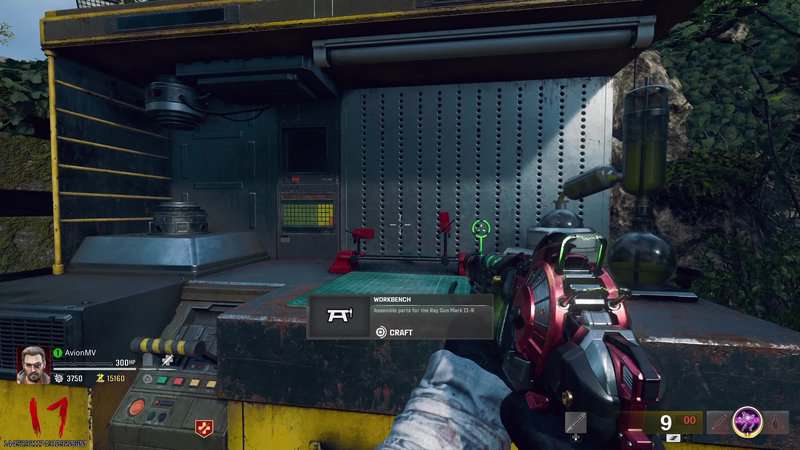
Go to the Garden Pond and interact with the yellow workbench at the west end of the spawn room to insert the Toxic Canister into it. Interact with the workbench to craft the Ray Gun Mark II-R.
Ray Gun Mark II-W
Now that you have a canister, you can get the Mark-W. Go to the top of the northwest stairs in Shem’s Henge and look across from the Speed Cola Perk Machine to find a canister charging station. You can put an Empty Canister in this machine.
When the Canister is inserted, blue Abominations will spawn. You will need to get these Abominations to shoot their lasers at 3 specific small rocks around Shem’s Henge. One is near the stairs to the south of the area, another is at the north end of the area, and the final one is between the Wall Buy and the door that leads toward the Garden Pond area. Once the Abomination shoots the rock, it will glow blue. Get the Abomination to do its charge attack at the rock to make it levitate in the air.
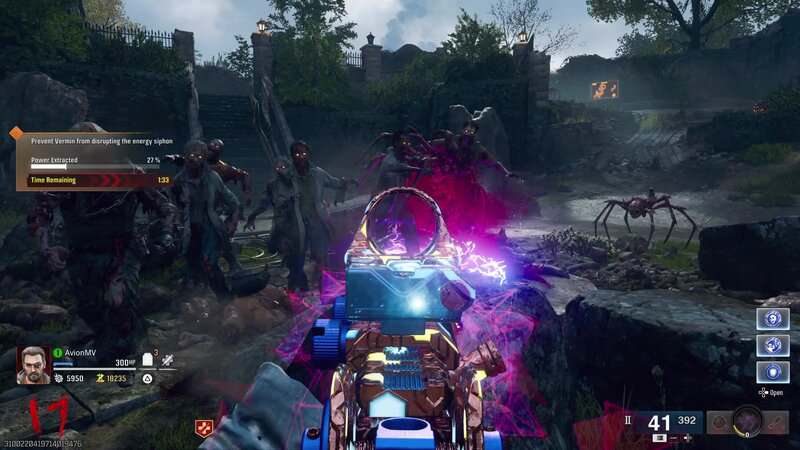
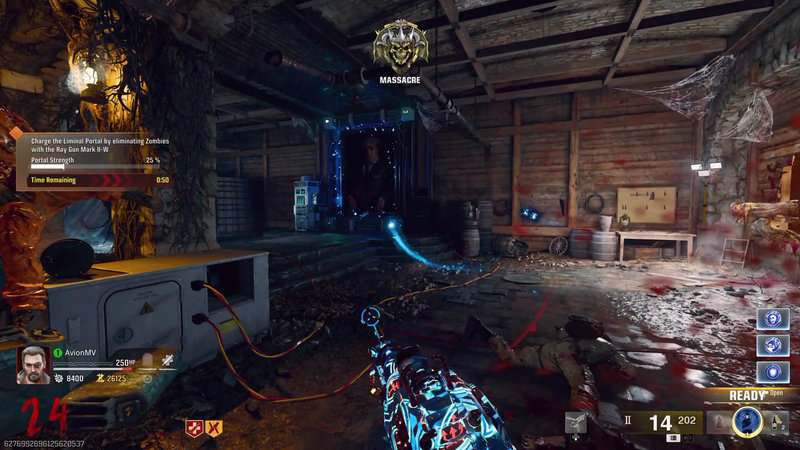
Once all the rocks are floating, the Abominations will die and you will need to defend a portal at the center of the area from Vermin. The rocks will charge the portal until a percentage bar reaches 100%. If any Vermin enter the portal, the percentage will drop. You will have 2 minutes to fully charge the portal. If you fail, you will need to try again in the next round. Once this is done successfully, the Empty Canister will become the Explosive Canister. Go back to the charging machine and pick up the canister.
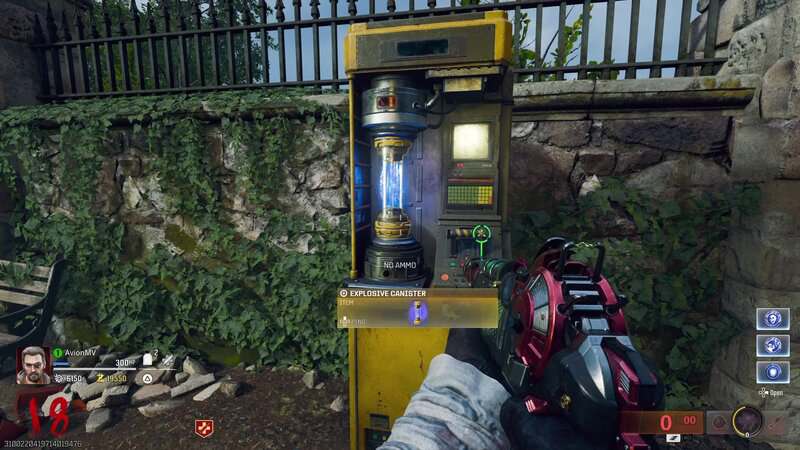
Go to the Supply Depot under the mansion and interact with the yellow workbench opposite the Armory door to insert the Explosive Canister into it. Interact with the workbench to craft the Ray Gun Mark II-W.

Complete All of the Paintings’ Rituals
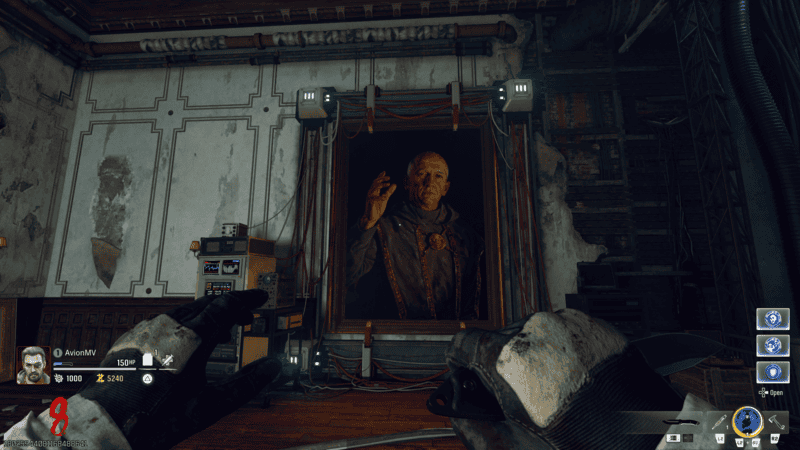
Now that you have acquired all of the Ray Gun Mark II variants, you will need to use them to complete rituals within the large paintings found throughout the mansion. Each of these paintings contains an otherworldly reflection of the manor known as a liminal space, which contains a ritual that must be completed to charge the Sentinel Artifact. Each room will require the use of a specific Mark II variant, but they can be done in any order.
Josiah Shem Painting
The Josiah Shem Painting can be found in the Baquette Hall to the left of the elevator. You will need to use the Mark II-P for this ritual. Interact with the machine to the left of the painting and then kill Zombies near it to charge the painting. Once enough souls have been channeled into the painting, it will open a portal into the liminal space.
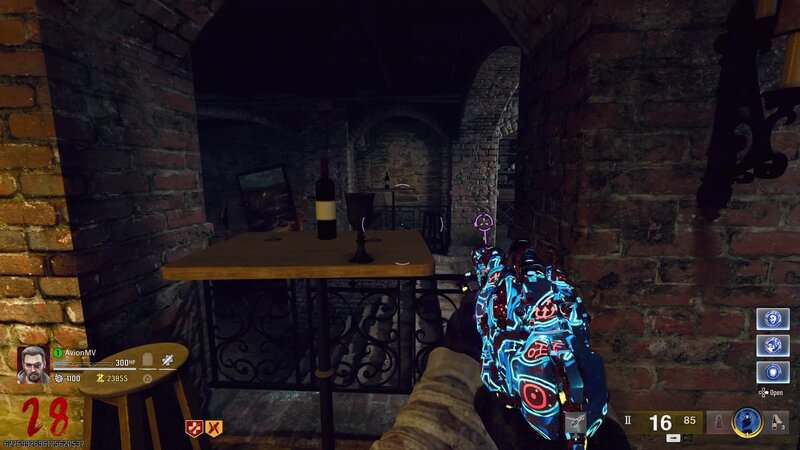
Go into the liminal space and pick up a red wine bottle from the dining table. You will need this for the following step.
There are 3 chalices in Shattered Veil that you will need to fill with wine from the bottle found in the liminal space. When you find these chalices, you will need to interact with them to pour the wine. This will spawn an Elder Disciple that you will need to defeat.
The first chalice is on a table in the Bottlery in the northwest corner of the map.
The next chalice is on a bench in the Overlook above the mansion’s entrance.
The last chalice is on a bench to the north of the bridge in the Garden Pond spawn room.
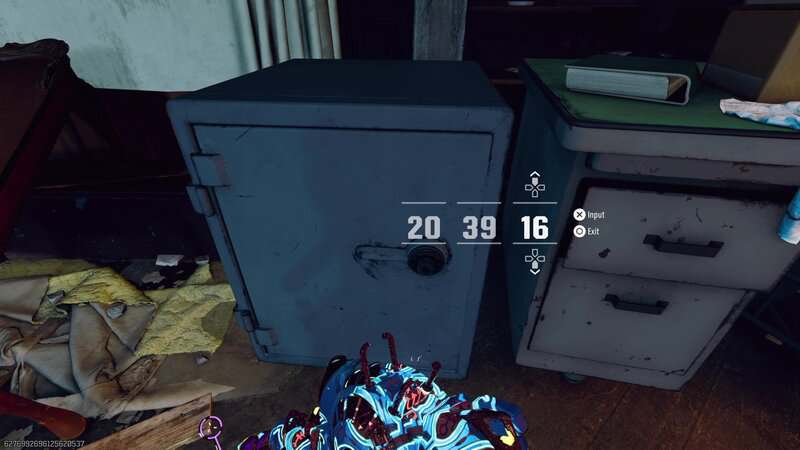
When each of these Disciples is defeated, a red number will be written on the walls of the Banquette Hall. There is a number to the left of the elevator, one behind the elevator, and one to the right of the elevator.
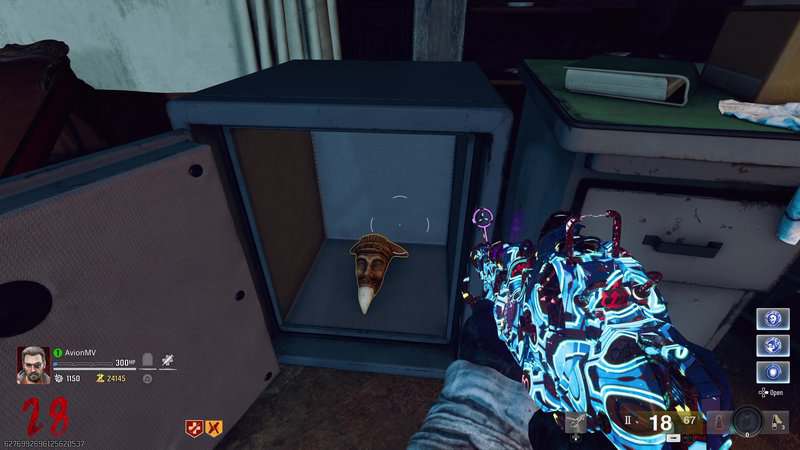
Go to the West Hallway and look to the right of the Death Perception Perk Machine to find a safe. Enter the left, back, and then right numbers into the safe to open it. You will find the Antler Carving relic inside.
Go into the Shem liminal space and interact with the altar inside to place the Sentinel Artifact. This will spawn an Elder Disciple that is surrounded by a defensive bubble that can only be broken with the Mark II-P. When you defeat this Disciple, you will charge the Artifact. Pick up the Artifact and the painting will reopen and allow you to leave the liminal space.
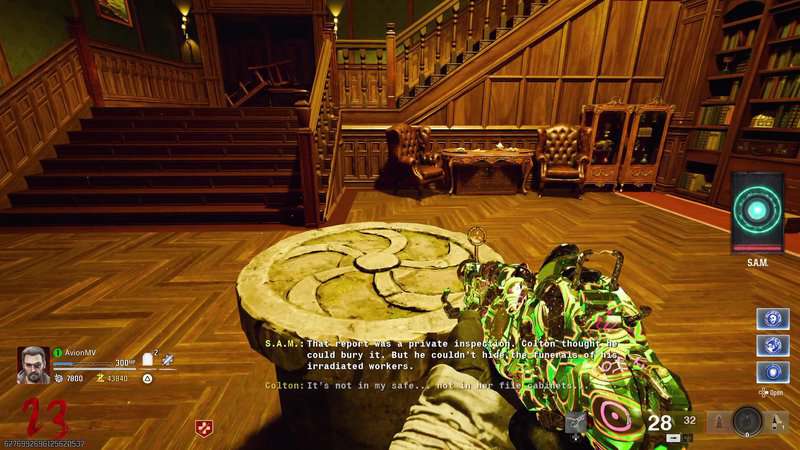
Sam Colten Painting
The Sam Colten painting can be found in the Library in the east part of the mansion. You will need to use the Mark II-R for this ritual. Interact with the machine to the left of the painting and then kill Zombies near it to charge the painting. Once enough souls have been channeled into the painting, it will open a portal into the liminal space.
You will need to collect 3 items that can only be seen while using the Aether Shroud Field Upgrade. These items are the Radiation ID Badge, the Ledger, and the Audio Log. Each of these items has a few different spawn locations that we will break down for you.
The ID Badge can be found in 1 of 3 fireplaces in the manor. One can be found in the East Foyer to the left of the Stamin-Up Perk Machine.
There is another fireplace in the Study.
The final fireplace is to the left of the elevator in the Banquette Hall.
Use Aether Shroud when near these fireplaces and you will find a ghostly ID Badge in one of them.
The Ledger can be found on 1 of 2 desks found around the mansion. One is at the top of the stairs on the second floor of the East Foyer.
The other location is in the Study to the right of the fireplace mentioned earlier.
Use Aether Shroud when near these desks and you will find the Ledger on one of them.
There are 2 places where the Audio Log can be found. One is on the desk in the Overlook near the bar in the southeast corner of the area.
The other location is on a suitcase on the sofa in the Library in front of the Colten painting.
Use Aether Shroud near these spots to find the log.
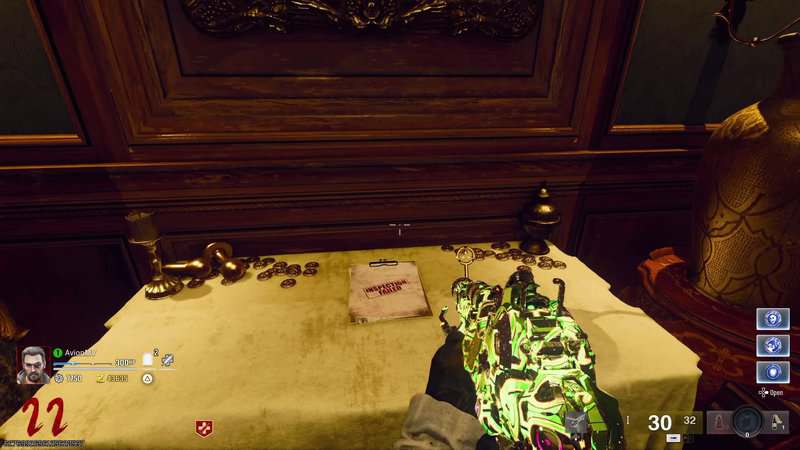
Once all 3 items are collected, you will be able to see 3 spectral books on the shelf opposite the painting in the Library. You will need to interact with these books in a specific order. Interact with the symbol that looks like a 9. Next, interact with the book with the circle that has a sideways T in it. Finally, interact with the book with the 3 circles. This will open a secret room behind a nearby bookshelf. You can pick up the Nuclear Plant Inspection from a table in this room.
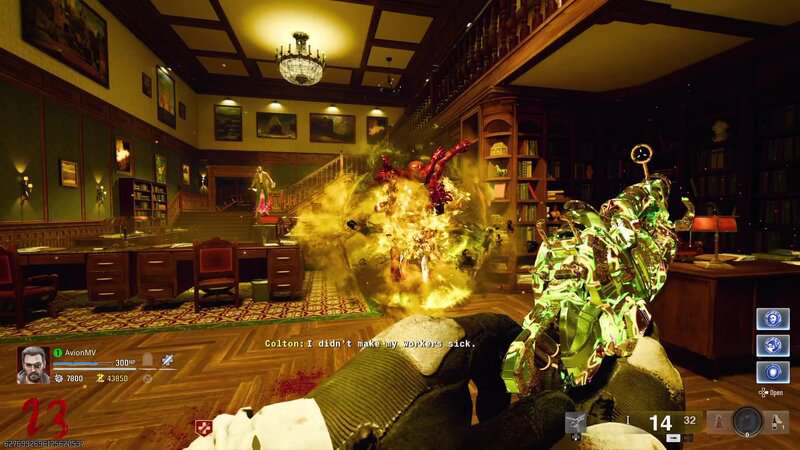
Go into the Colten liminal space and interact with the altar inside to place the Sentinel Artifact. This will spawn an Amalgam surrounded by a defensive bubble that can only be broken with the Mark II-R. When you defeat this Amalgam, you will charge the Artifact. Pick up the Artifact and the painting will reopen and allow you to leave the liminal space.
Fats Malloy Painting
Go down into the Distillery, the room revealed by opening the passage with the scone Simon Says. This is where you will find the Fats Malloy painting. You will need to use the Mark II-W for this ritual. Interact with the machine to the left of the painting and then kill Zombies near it to charge the painting. Once enough souls have been channeled into the painting, it will open a portal into the liminal space.
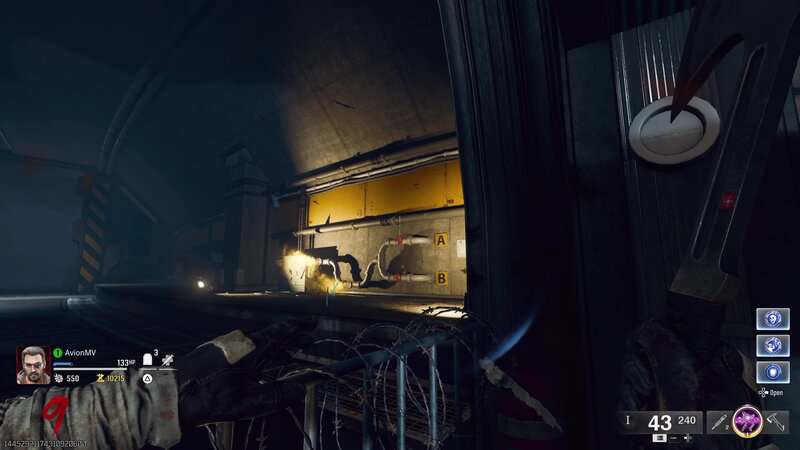
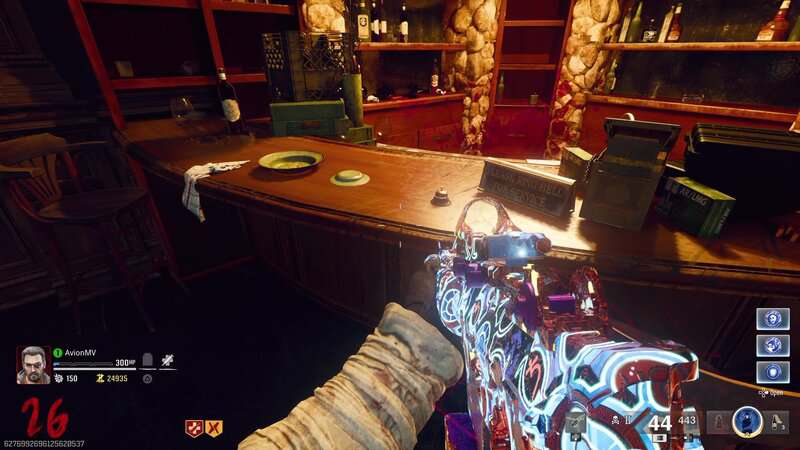
Go to the Study, the area north of the Library, and go into the room with the Swat 5.56 Wall Buy. There is a small Bell that spawns somewhere in this room. I can be found behind some of the glass in the cabinets, on a small set of TVs, or on the ground. The best way to find this item is by destroying all of the glass in the room and then holding the interact button along each wall until you pick up the item.
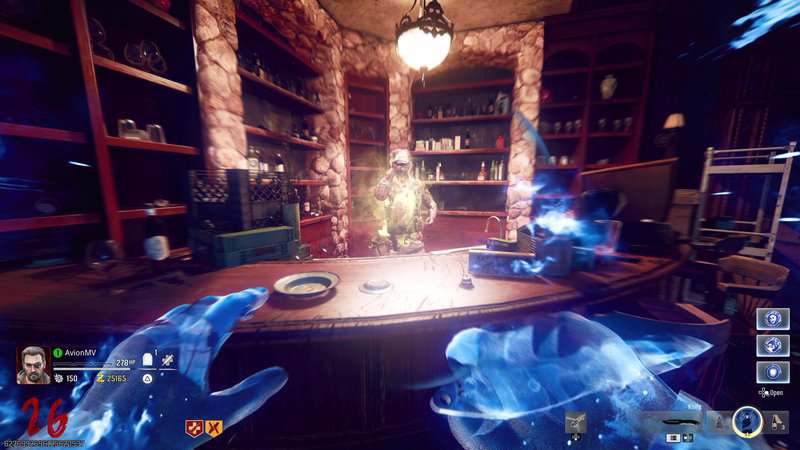
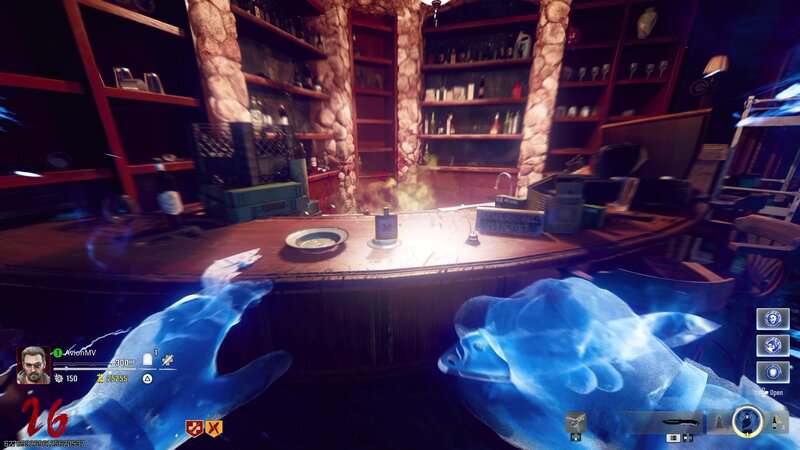
Take the Bell to the southeast corner of the Overlook to find a small bar. Interact with the bar to place the Bell on it. Now, use the Brain Rot Ammo Mod and turn a Zombie into a friendly. Once this happens, ring the Bell by interacting with it. This will cause your Brain Rotted Zombie to jump over the bar and prepare itself a drink. When the Zombie drinks, it will explode and leave the Hip Flask on a small plate found on the bar. Pick up the flask.
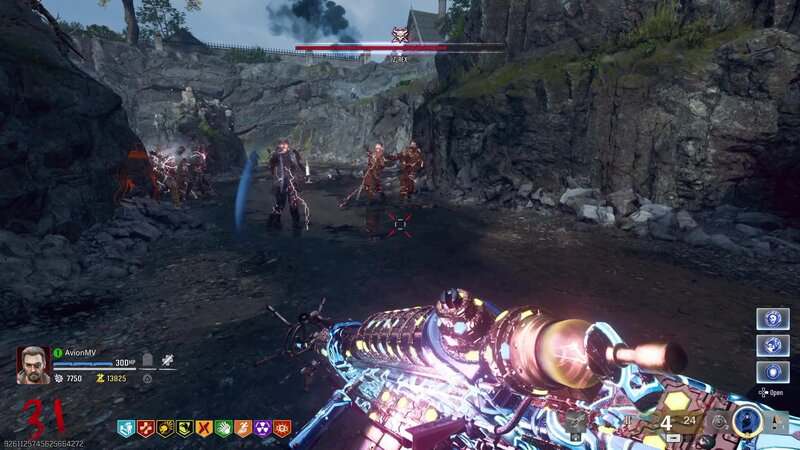
Go into the Malloy liminal space and interact with the altar inside to place the Sentinel Artifact. This will spawn a Mangler surrounded by a defensive bubble that can only be broken with the Mark II-R. When you defeat this Mangler, you will charge the Artifact. Pick up the Artifact and the painting will reopen and allow you to leave the liminal space.
Prepare for the Boss Fight
Now that you have completed all of the liminal space rituals, the Sentinel Artifact will be fully charged. This means you can now enter the Shattered Veil boss fight. Before entering the boss arena, here are some suggestions for weapons that you will want to make sure you get.
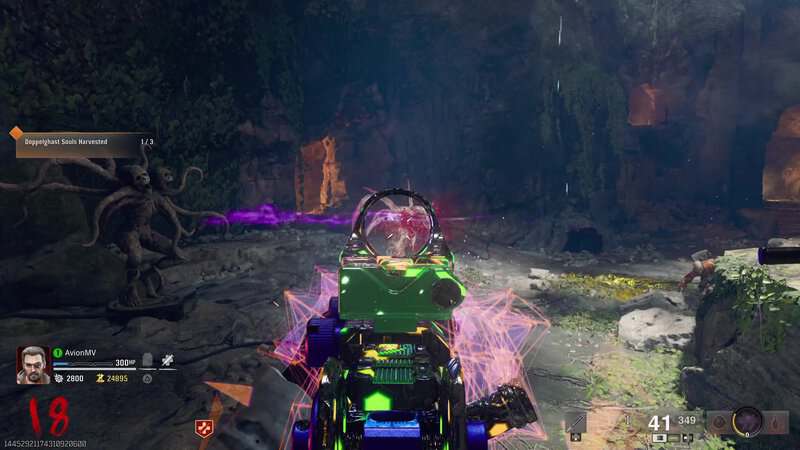
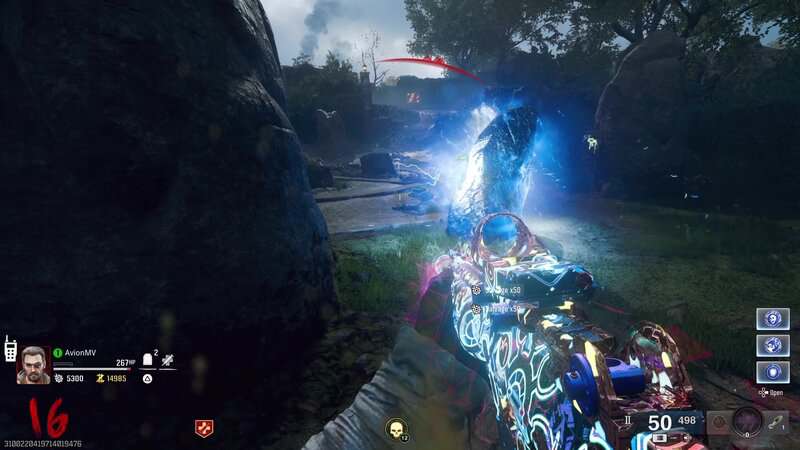
I suggest getting the Ray Gun Mark II-W and the Wunderwaffe DG-2 as your weapons since these Wonder Weapons are great against the boss. The former will allow you to do massive damage while the latter is great for dealing with the Zombies that attack along with the boss.
While using both Wonder Weapons is great, there is a bullet weapon that can actually give you the highest damage output. While it doesn’t have the best handling, its damage can quickly whittle down the health of the boss. This weapon is the AMR Mod 4 Sniper Rifle. When Pack-a-Punched, this weapon gets a very quick rate of fire and deals massive damage. I suggest putting on a low-magnification Optic since you will be engaging enemies in close quarters during the fight. There are a few other attachments that you can throw on, but Rapid Fire and Extended Mag II are the main focus, along with the Optic. Couple this with the Double Tap Perk and Augments mentioned earlier, and this weapon can destroy the boss and any Zombies alongside it.
You will use either the Ray Mark II-W or the AMR Mod 4 as your primary weapon against the boss. Get this weapon to Level 3 Pack-a-Punch and get the Sniper to Legendary Tier if you decide to bring it. Use the Wonderwaffe as your secondary weapon to help with crowd control. I also highly suggest you get a Chopper Gunner Killstreak as it can save you in a pinch and will also quickly end the last phase if used at the right time. Make sure you get the Perks mentioned at the start of the guide and you are ready to go into the fight.
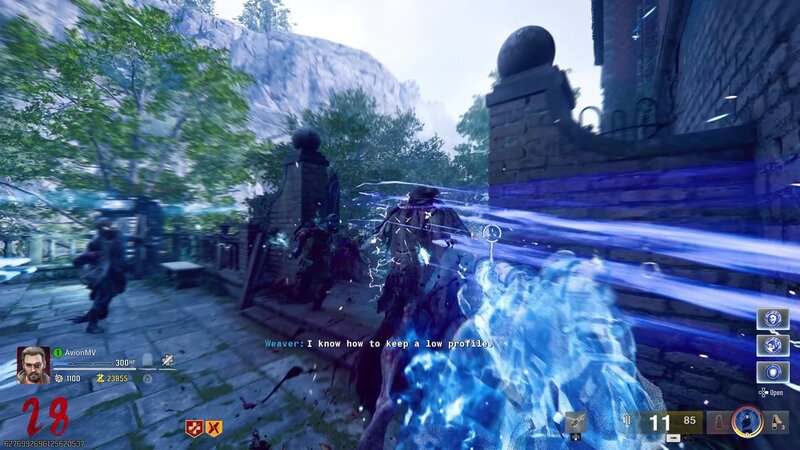
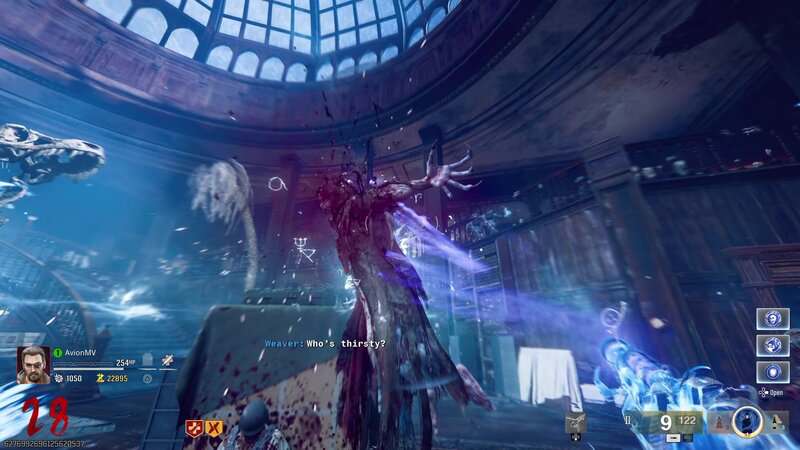
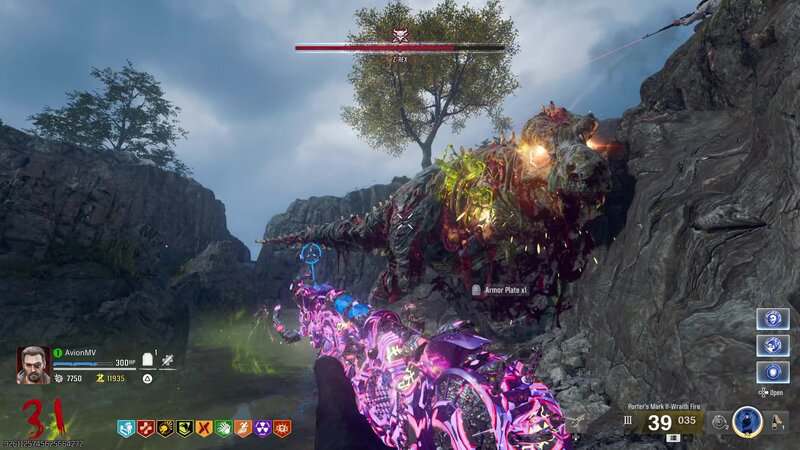
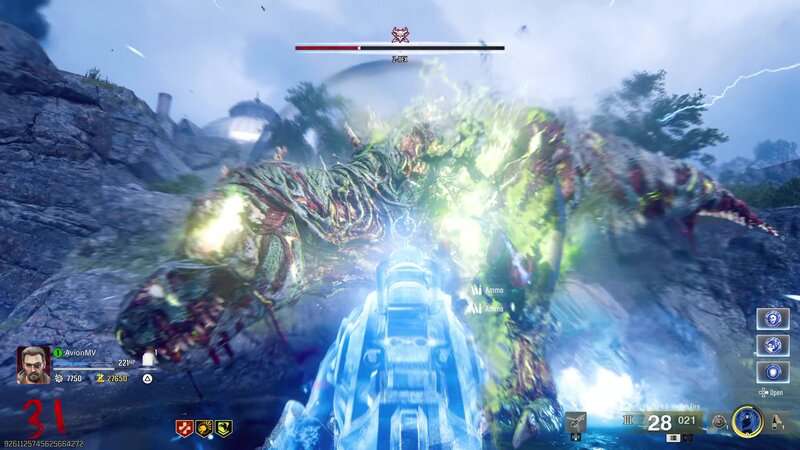
Z-Rex Boss Fight
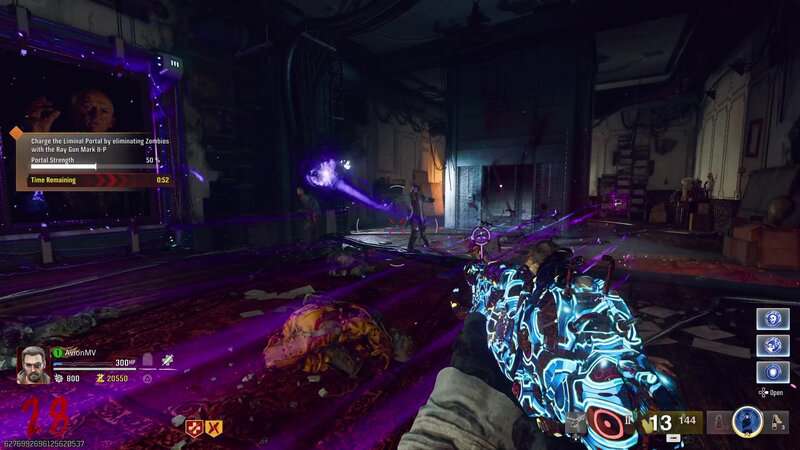
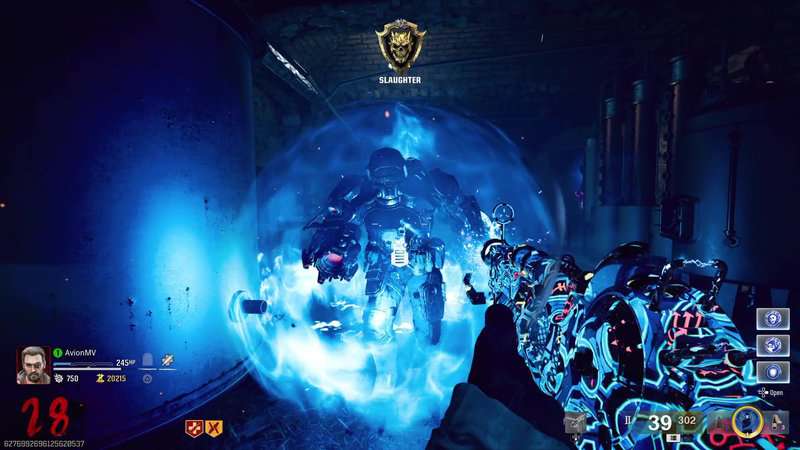
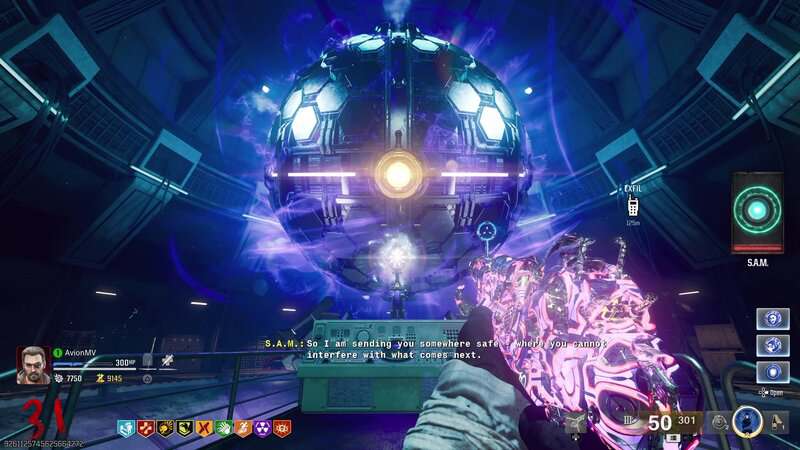
Now that the Sentinel Artifact is fully charged and you have prepared for the battle ahead, go down into the Mainframe Chamber. At the north and south ends of this room is a terminal that you interact with to give S.A.M. the Artifact. S.A.M. will take the Artifact and trap you in a liminal space with Richtofen. After the cutscene, you will enter an outdoor arena where you will find the undead T-Rex known as the Z-Rex.


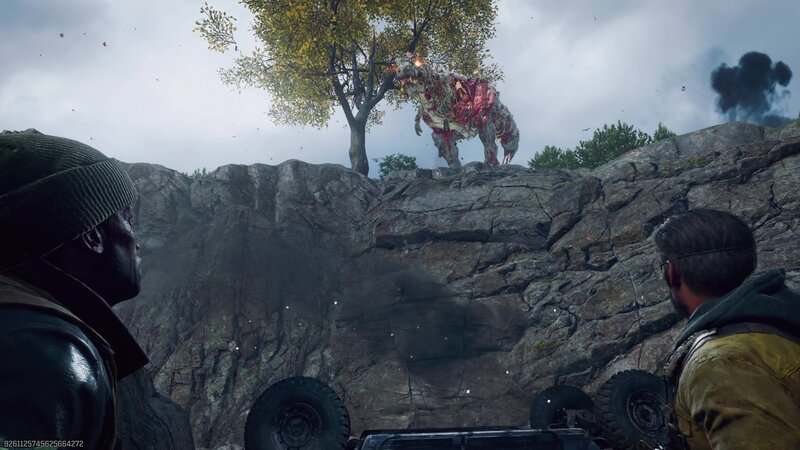
You can do damage to the boss by shooting it with any weapon but there are two primary targets you will need to aim for. The Z-Rex will eat Zombies around the area, which will cause them to protrude from its open ribcage. These Zombies sticking out of the ribs of the boss are the Z-Rex critical spots. Shoot these Zombies with either the Mark II-W or the AMR Mod 4 to deal massive damage. When there aren’t any Zombies coming out of the ribs, the other critical spot is the eyes of the Z-Rex. As you move around the arena, there will be green circles on the ground that will do damage and slow you down, so you will need to avoid these circles as you move around.
Once the boss loses a quarter of its health, it will jump up onto the nearby cliff, making it invisible to damage and spraying poison down in the area below. This will create new green circles and spawn a wave of very fast Zombies. Use your Wunderwaffe to survive this onslaught. This wave ends with a Max Ammo drop, so make sure you save your AMR Mod 4 or Mark II-W ammo. After about a minute, the Z-Rex will hop down and continue the next phase.
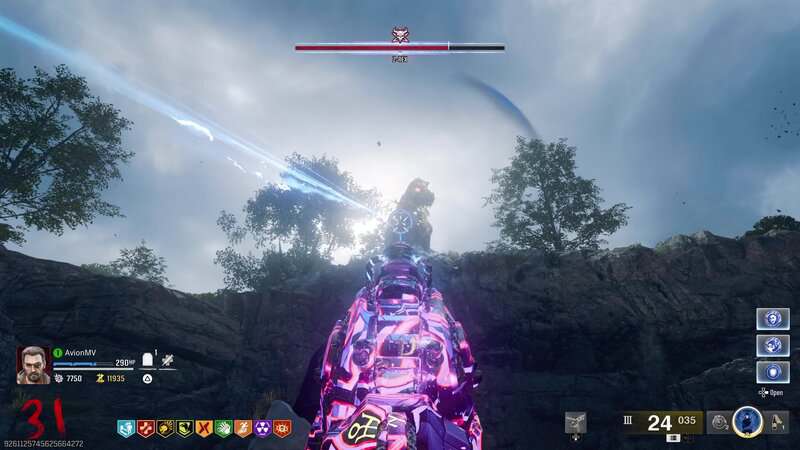
The second phase is very similar to the first one, so just repeat the same game plan mentioned above. When the boss reaches half health, it will evolve, turning green. It will then hop up to the cliff again. Survive this phase until the boss hops down.
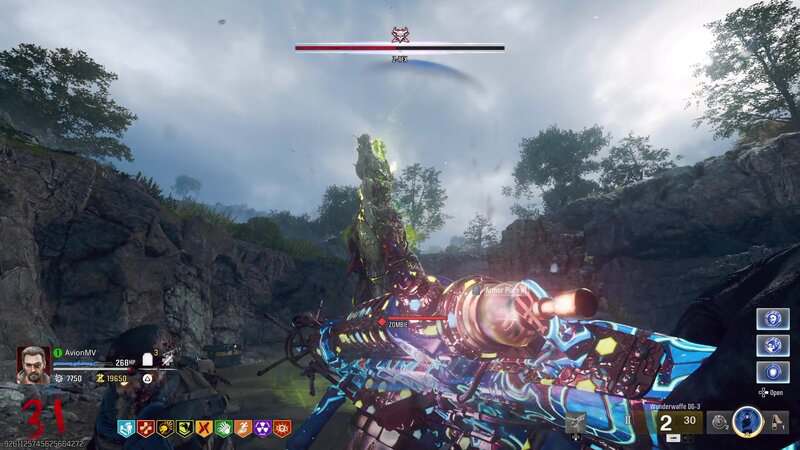
The Z-Rex will now be much faster and will do increased damage. This is where Stamin-Up and PhD Flopper perks will help outpace the dinosaur. Avoid his stops and bites while still targeting the weak points to deal damage.
Repeat this process in the last two phases. If you still have your Chopper Gunner, use it during the final phase and you should be able to do enough damage to bring the boss down.
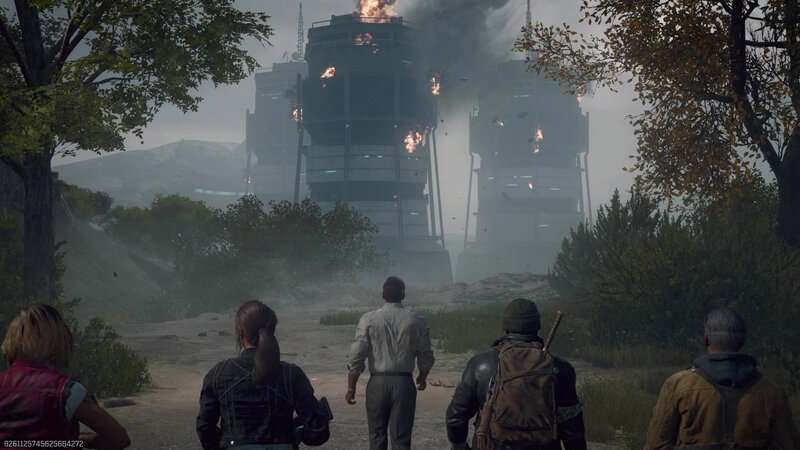
Once the Z-Rex is defeated, the ending cutscene will play and will show our crew heading toward Janus Towers, the next map in the Dark Aether story. When the cutscene concludes. You can choose to leave the match immediately or continue to play. Returning to the game of The Tomb will reward you with Points, several Legendary Tier weapons, Legendary Aether Wrenches, Flawless Aetherium Crystals, and all the Perks in the game.
Now you can complete the Shattered Veil Main Quest Easter Egg in Black Ops 6 Zombies. Stay tuned to Gameranx for more news, updates, and guides for Black Ops 6 as well as other great games in the future.